在本指南中,你将学习:
- Pydoll 是什么,以及它提供的功能
- 如何使用它来爬取使用 JavaScript 渲染的页面
- 如何绕过 Cloudflare 防护
- Pydoll 最大的局限性是什么
- 如何通过轮换代理来克服这些局限性
- 基于 Python 的主要替代方案有哪些
让我们开始吧!
Pydoll 简介
了解什么是 Pydoll,它是如何工作的,以及作为 Python 爬虫库 它能提供哪些功能。
它是什么
Pydoll 是一个用于 Web 爬虫、测试以及自动化重复任务的 Python 浏览器自动化库。它的独特之处在于不再需要传统的浏览器驱动程序。具体来说,它通过 DevTools Protocol 直接连接浏览器——无需额外依赖。
Pydoll 的第一个稳定版本(v1.0)于 2026 年 2 月发布。这意味着它在爬虫领域还属于比较新的工具。但即便如此,它已经在快速发展中,在 GitHub 上获得了 3,000 多个星标:
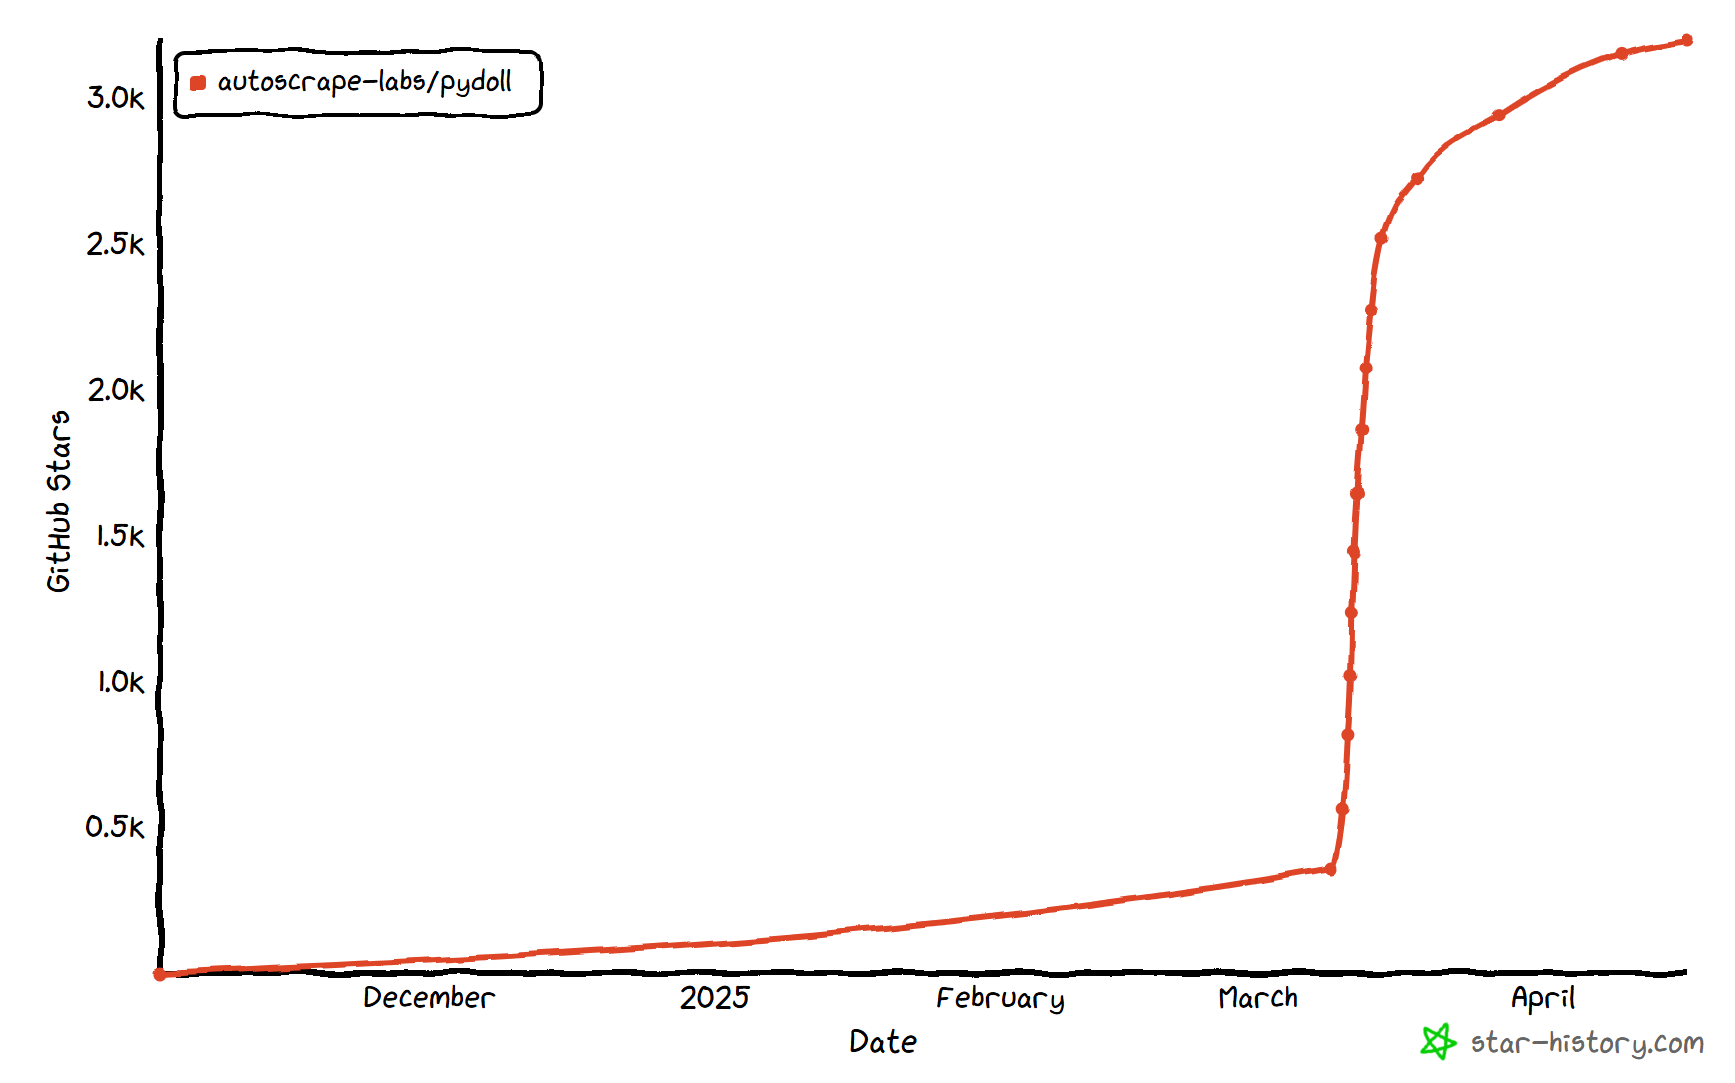
如你所见,该库在 Python 爬虫社区中人气不低。
功能特点
以下是 Pydoll 提供的主要特性概览:
- 无浏览器驱动:不再依赖浏览器驱动,减少版本不匹配问题,并简化对基于 Chromium 的自动化环境设置。
- 异步优先架构:完全基于 asyncio 构建,具有高并发、内存效率以及现代 Python 开发模式。
- 模拟真实用户操作:通过模拟真实的输入、鼠标移动与点击来减少在自动化过程中的机器人检测。
- 事件驱动能力:可对浏览器、DOM、网络或生命周期事件进行实时响应,提升自动化的灵活性。
- 多浏览器支持:适用于 Chrome、Edge 以及其他 Chromium 浏览器,提供统一的接口。
- 截图与 PDF 导出:可对整个页面或特定元素进行截图,也可将加载完的任意网页生成高质量 PDF 文件。
- 内置 Cloudflare 绕过:无需第三方服务就能自动绕过 Cloudflare 反机器人,只要所使用的 IP 信誉较高即可模拟可信浏览器会话。
- 并发爬取:可并行爬取多个页面或网站,大幅缩短总执行时间。
- 高级键盘控制:可真实地模拟用户键入,包括节奏、修饰键以及特殊按键处理。
- 强大的事件系统:可实时监控并处理网络请求、页面加载与自定义浏览器事件。
- 文件上传支持:既能直接在输入字段上传文件,也能对交互式文件选择对话框完成自动化操作。
- 代理集成:支持通过代理进行 IP 轮换、地理定位或避免爬虫频率过高而被封禁。
- 请求拦截:可拦截、修改或屏蔽 HTTP 请求与响应,从而在自动化和爬虫时获得高度控制。
更多详细信息可参阅官方文档。
使用 Pydoll 进行 Web 爬虫:完整教程
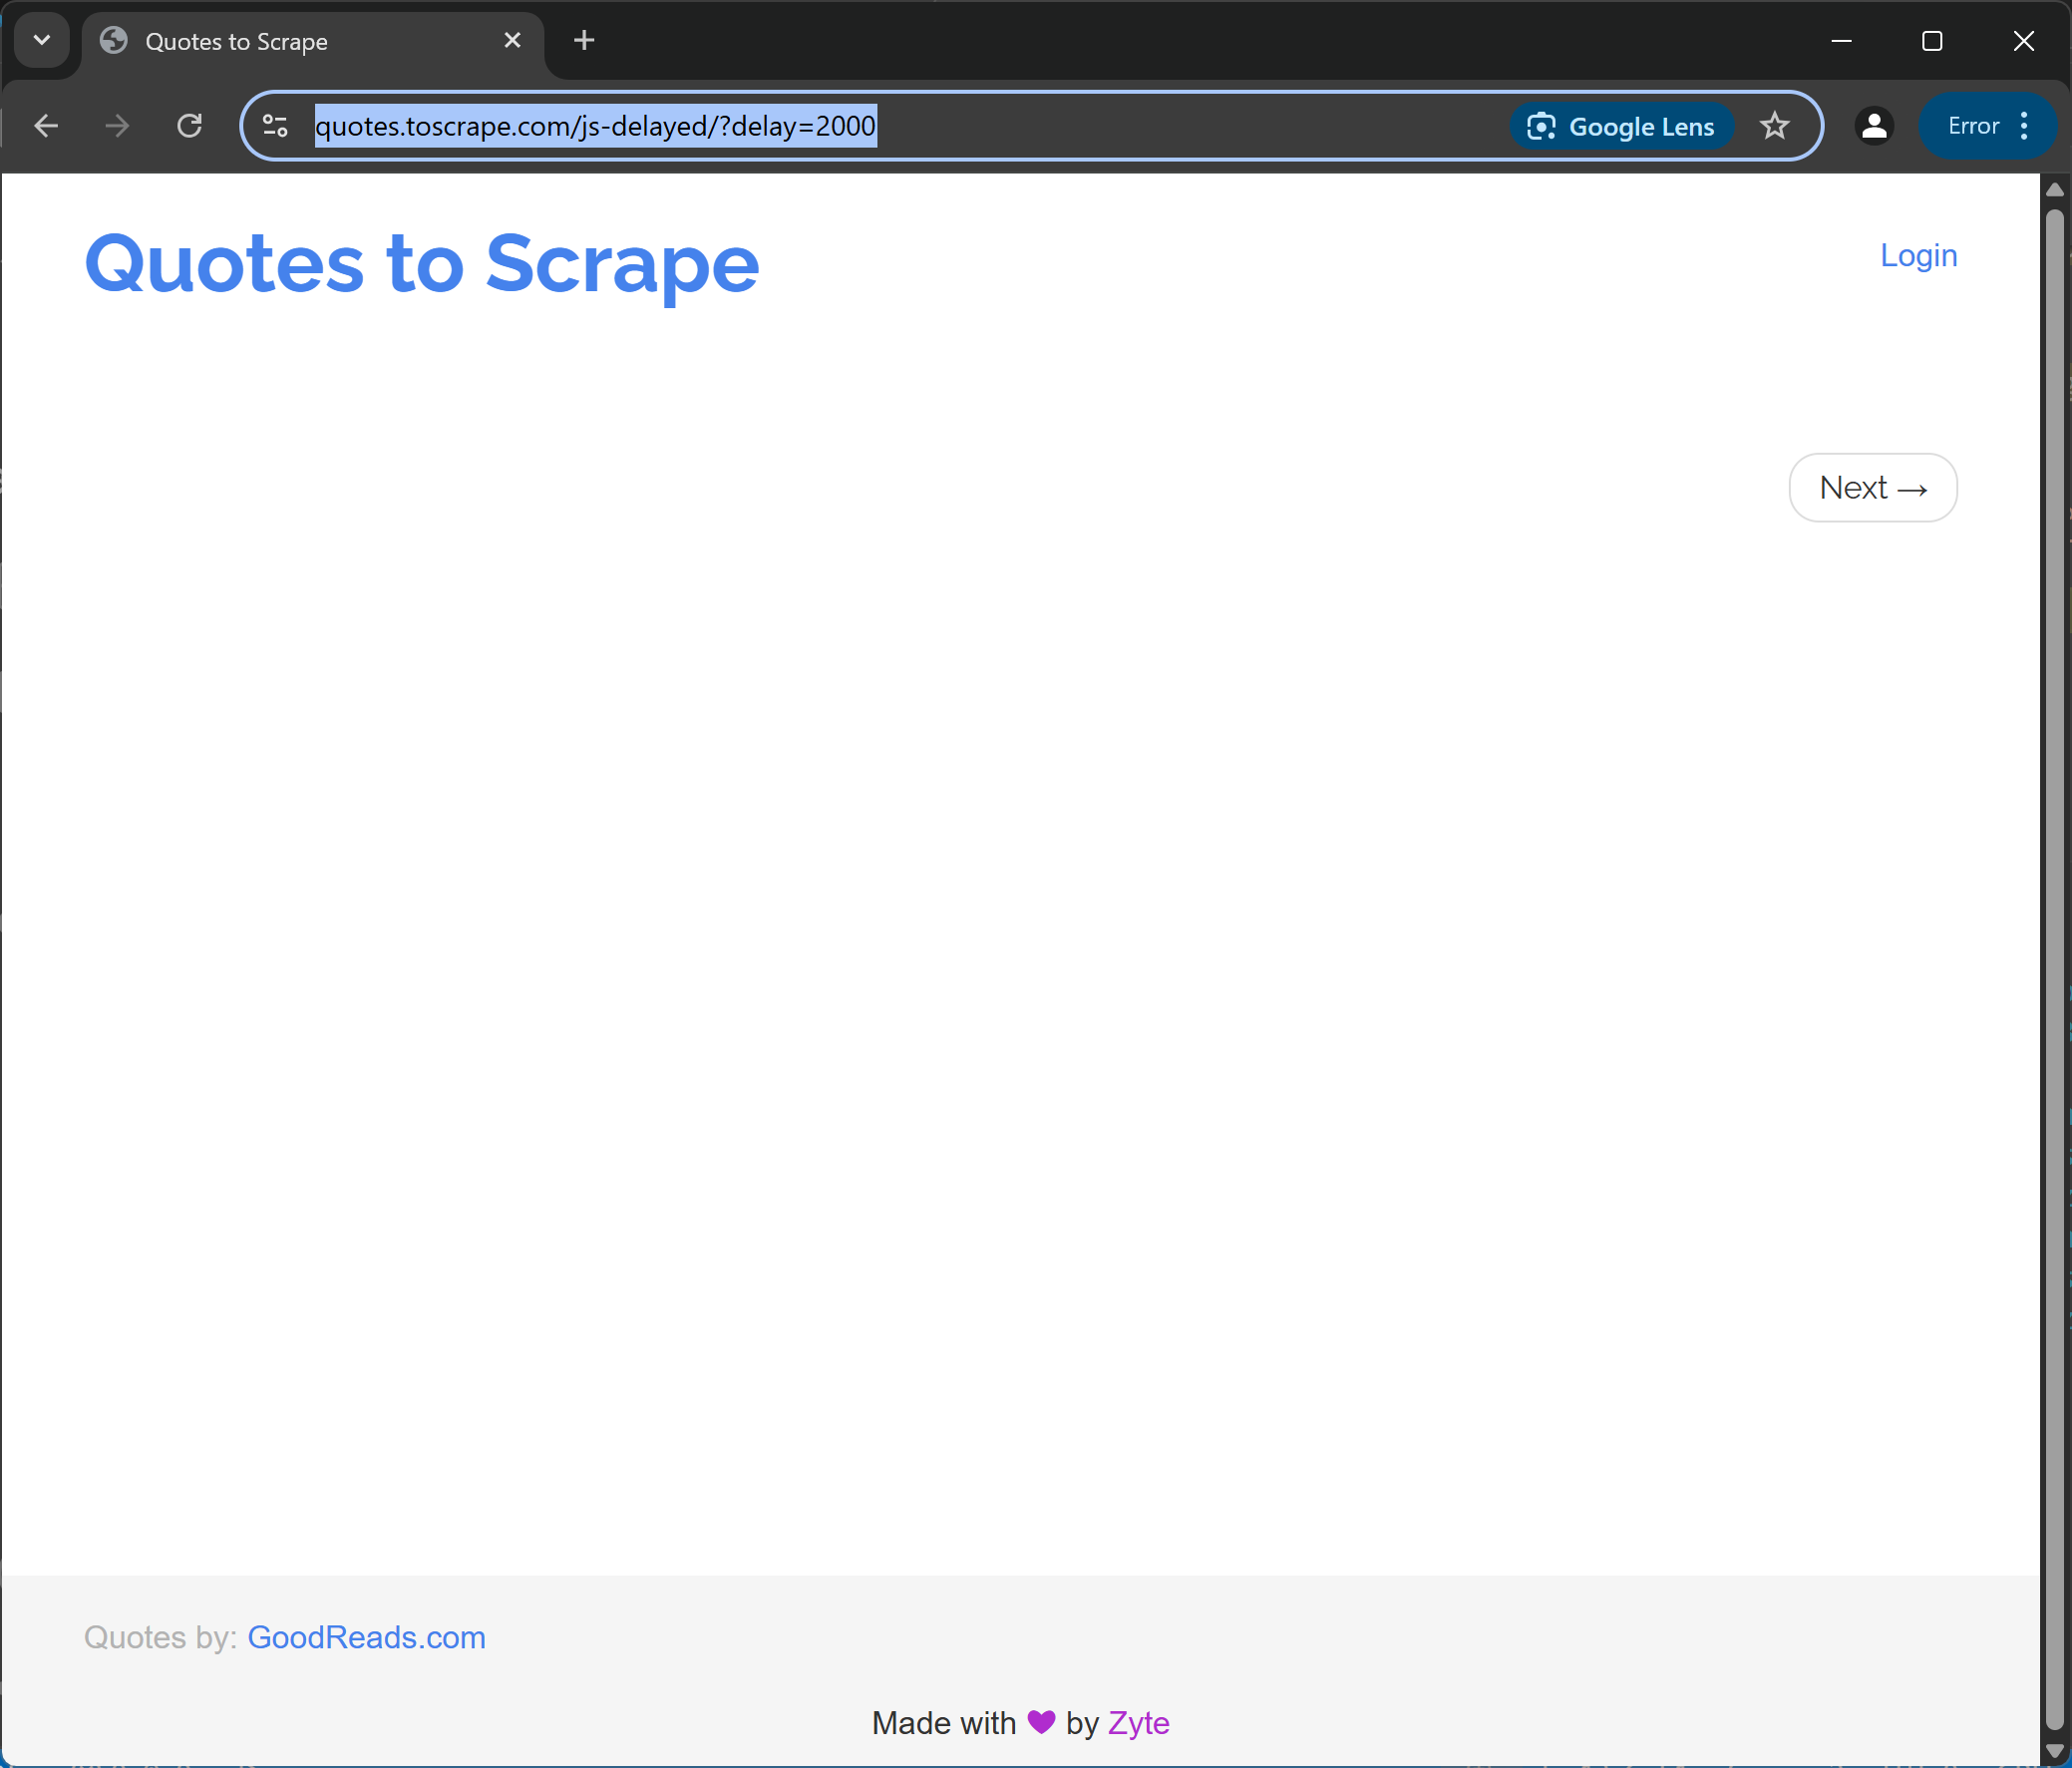
在本教程部分,你将学习如何使用 Pydoll 从一个异步加载、由 JavaScript 驱动的 “Quotes to Scrape” 网页中获取数据:
这个页面会在短暂延迟后通过 JavaScript 动态渲染内容,因此传统的爬虫工具无法直接获取该数据。要提取此页面的内容,你需要像 Pydoll 这样的浏览器自动化工具。
请按照以下步骤来构建一个 Pydoll 爬虫,从 “Quotes to Scrape” 页面动态提取名句数据。
步骤 #1:项目初始化
开始之前,请确认你的机器上已经安装了 Python 3+。如果尚未安装,请从 Python 官网 下载并按照说明完成安装。
然后,执行以下命令为你的爬虫项目创建一个文件夹:
mkdir pydoll-scraperpydoll-scraper 文件夹将会作为你的项目文件夹。
在终端进入该文件夹,并创建一个 Python 虚拟环境(venv):
cd pydoll-scraper
python -m venv venv
用你喜欢的 Python IDE 打开该项目文件夹。例如 Visual Studio Code(安装 Python 插件) 或 PyCharm Community Edition。
在项目文件夹下创建一个名为 scraper.py 的文件,此时的项目结构类似:
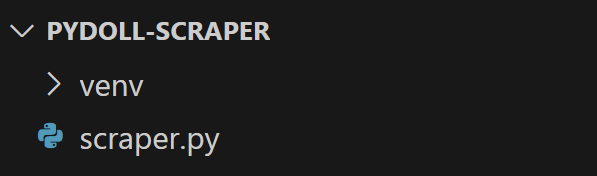
此时,scraper.py 只是一个空的 Python 脚本,我们稍后会添加代码并编写数据处理逻辑。
接下来,在 IDE 的终端中激活虚拟环境。Linux 或 macOS 上可运行:
source venv/bin/activate在 Windows 上,可以执行:
venv/Scripts/activate很好!你的 Python 环境已经就绪,可以用来运行 Pydoll 了。
步骤 #2:安装 Pydoll
在虚拟环境已激活的状态下,通过 pydoll-python 包安装 Pydoll:
pip install pydoll-python
然后,在 scraper.py 文件中添加以下逻辑以开始使用 Pydoll:
import asyncio
from pydoll.browser.chrome import Chrome

async def main():
    async with Chrome() as browser:
        # Launch the Chrome browser and open a new page
        await browser.start()
        page = await browser.get_page()

        # scraping logic...

# Execute the async scraping function
asyncio.run(main())
需要注意的是,Pydoll 提供的是异步 API,因此需要用到 Python 的 asyncio 库配合使用。
太好了!你现在已经拥有了一个最简单的 Pydoll 脚本。
步骤 #3:连接到目标网站
调用 go_to() 方法来访问目标网址:
await page.go_to("https://quotes.toscrape.com/js-delayed/?delay=2000")?delay=2000 这个查询参数可以让页面在 2 秒后动态加载需要的数据。这是目标示例站点的特殊功能,主要用于测试动态数据加载的爬虫。
现在,可以尝试运行脚本。如果一切正常,Pydoll 将会:
- 启动一个 Chrome 实例
- 导航到目标网站
- 因为脚本中没有下一步操作,所以会在完成上述操作后立即关闭浏览器
大致上,你应该能在浏览器关闭前瞬间看到如下页面:
很好!接下来我们将添加等待逻辑。
步骤 #4:等待 HTML 元素出现
请注意上一步截图中,页面里还没有加载任何可见内容,因为目标站点会在 2 秒后通过 JavaScript 动态渲染名句内容。这在 https://hackernoon.com/how-to-scrape-modern-spas-pwas-and-ai-driven-dynamic-sites 等 SPA 动态网站中非常常见。
详情可参考我们的文章:如何用 Python 爬取动态网站。
为解决这个常见问题,Pydoll 提供了 内置的等待机制:
wait_element(): 等待单个元素出现(可设置超时)
此方法允许使用 CSS 选择器、XPath 等,类似于 Selenium 的 By 类。
让我们先查看目标页面的 HTML 结构。打开该页面,等待名句元素载入后,右键点击任意一句内容并选择“Inspect”(检查):
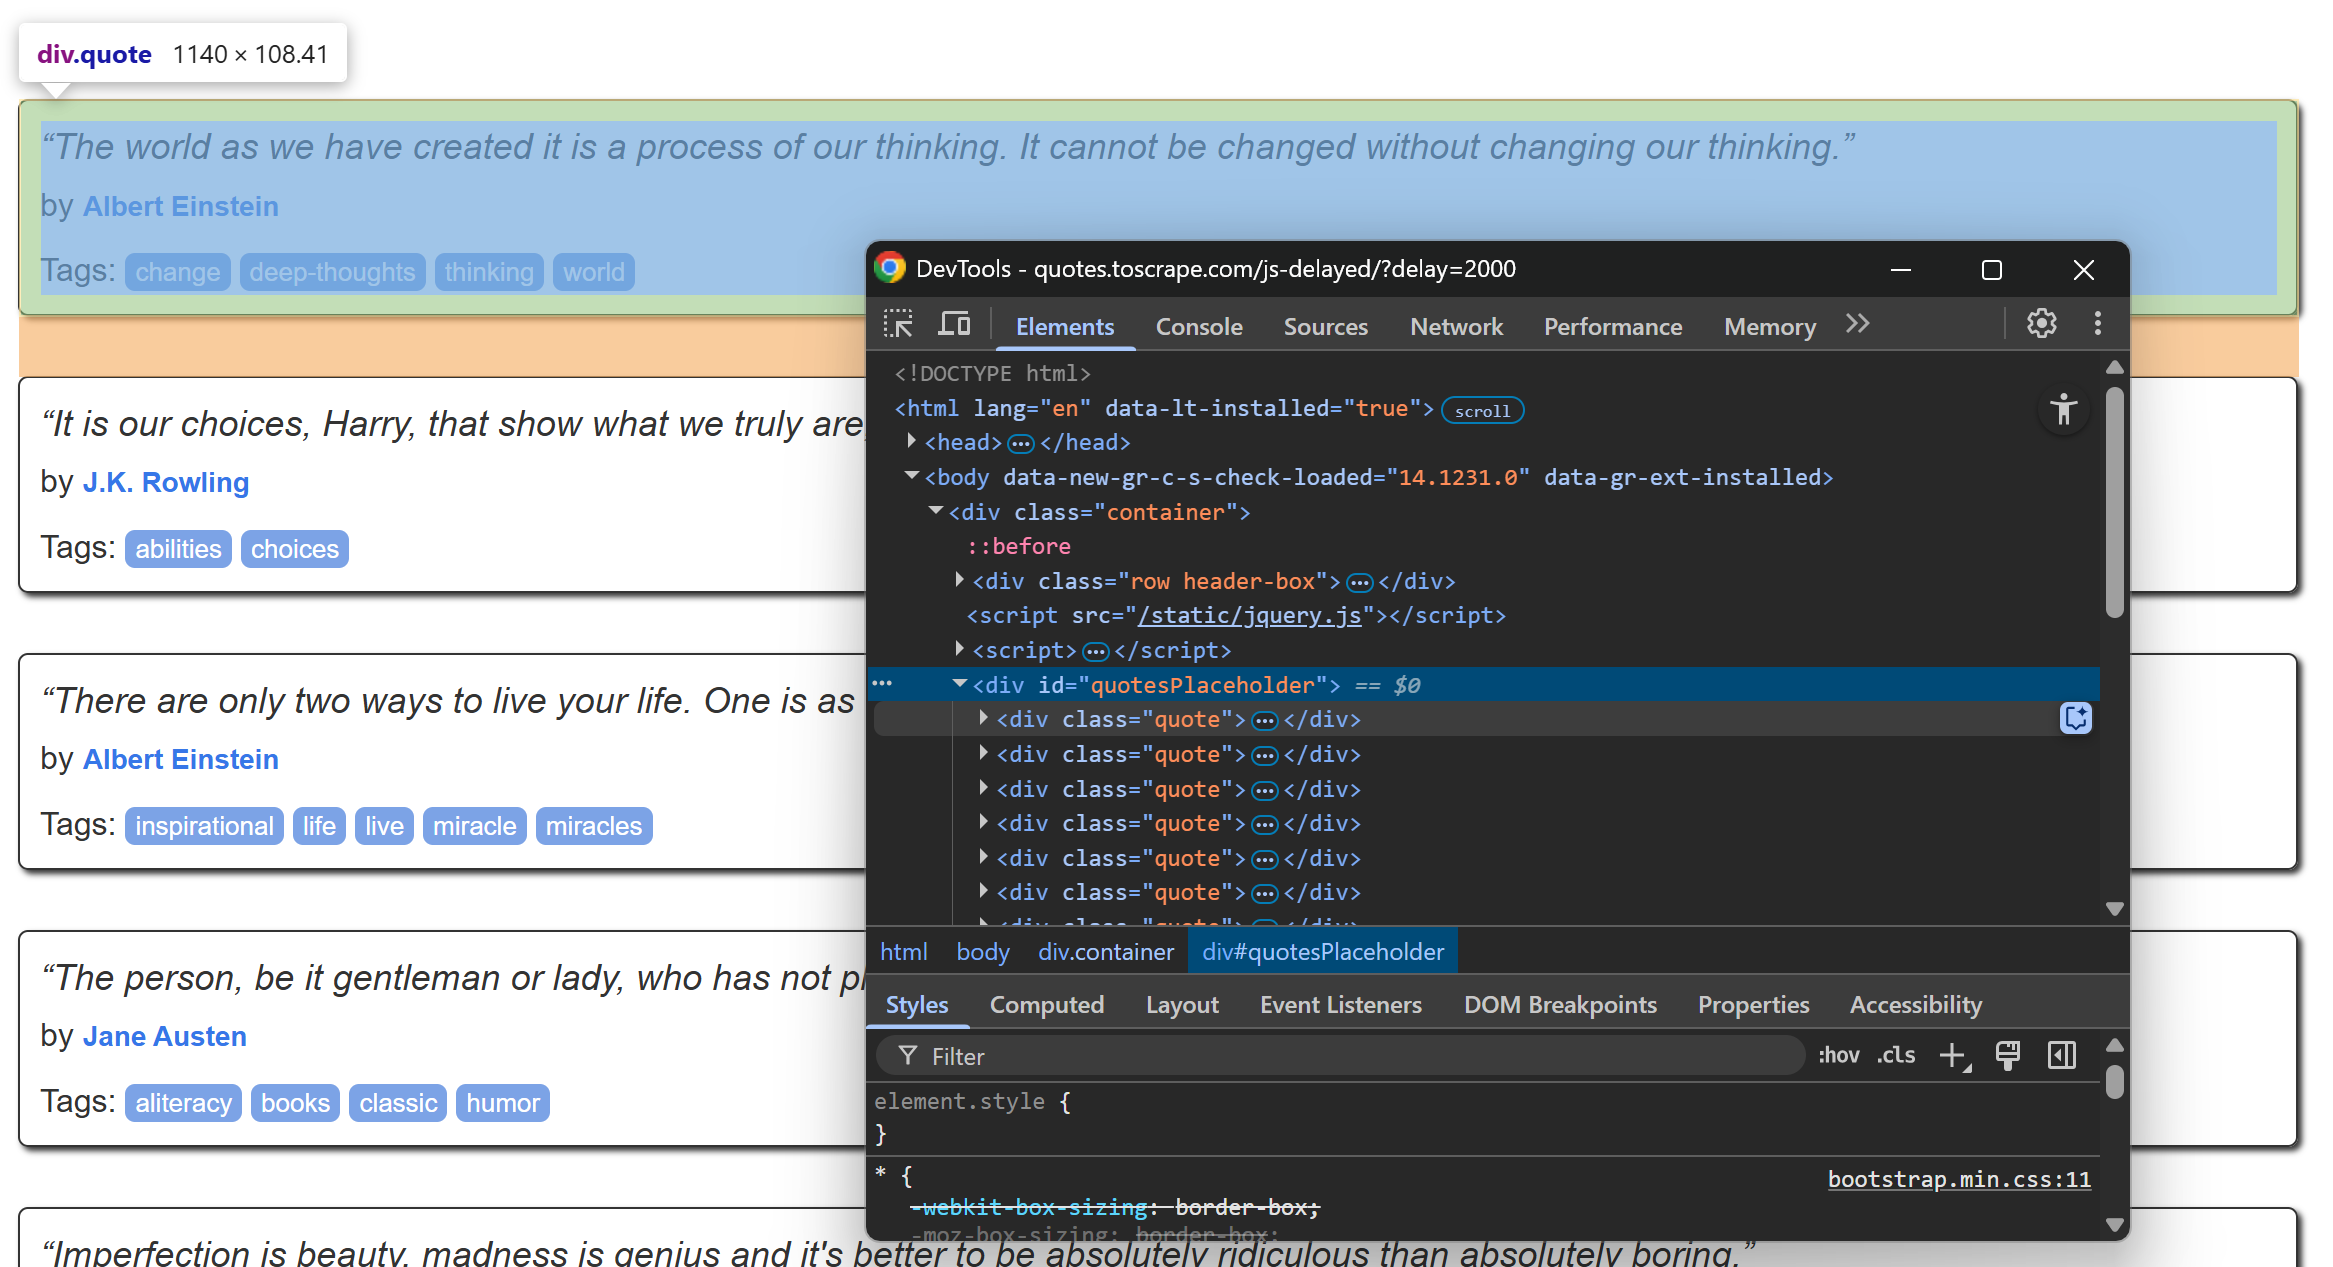
在开发者工具中,你会看到每条名句都被放在一个带有 quote 类的 <div> 标签里。因此,你可以通过以下 CSS 选择器来定位它们:
.quote现在,用 Pydoll 来等待这些元素出现:
await page.wait_element(By.CSS_SELECTOR, ".quote", timeout=3)此外,别忘了导入 By:
from pydoll.constants import By再跑一遍脚本,你会发现 Pydoll 会在名句元素加载出来后才会关闭浏览器。很棒!
步骤 #5:准备爬取数据
目标页面上不止一条名句,所以我们需要一个数据结构来存储它们。一个简单的数组就可以:
quotes = []为了查找页面中的元素,Pydoll 提供了以下方便的方法:
find_element(): 找到第一个匹配元素find_elements(): 找到所有匹配元素
与 wait_element() 类似,这些方法都可以使用 By 来指定选择器。
因此,你可以通过以下方式获取页面上的所有名句元素:
quote_elements = await page.find_elements(By.CSS_SELECTOR, ".quote")接着,遍历这些元素,为后续爬取逻辑做准备:
for quote_element in quote_elements:
  # Scraping logic...
很棒!接下来就是实际的数据解析逻辑。
步骤 #6:实现数据解析逻辑
先来仔细查看某一个名句元素的结构:

从上图可见,一个名句元素包含:
- 存放名句文本的
.text节点 - 存放作者的
.author元素 - 多个存放标签(tags)的
.tag元素
实现爬取逻辑来获取这些内容:
# Extract the quote text (and remove curly quotes)
text_element = await quote_element.find_element(By.CSS_SELECTOR, ".text")
text = (await text_element.get_element_text()).replace("“", "").replace("”", "")

# Extract the author name
author_element = await quote_element.find_element(By.CSS_SELECTOR, ".author")
author = await author_element.get_element_text()

# Extract all associated tags
tag_elements = await quote_element.find_elements(By.CSS_SELECTOR, ".tag")
tags = [await tag_element.get_element_text() for tag_element in tag_elements]注意:这里用 replace() 方法去掉了名句文本里的花括号双引号。
然后,用爬到的数据构造一个字典对象并追加到 quotes 列表中:
# Populate a new quote with the scraped data
quote = {
    "text": text,
    "author": author,
    "tags": tags
}
# Append the extracted quote to the list
quotes.append(quote)
搞定!接下来只需将这些数据导出成 CSV 文件即可。
步骤 #7:导出 CSV
现在,爬取到的数据都保存在 Python 列表里。为了更方便分享或查看,可以将它们导出为易读的 CSV 格式。
使用 Python 创建一个名为 quotes.csv 的文件,并写入所爬取的数据:
with open("quotes.csv", "w", newline="", encoding="utf-8") as csvfile:
            # Add the header
            fieldnames = ["text", "author", "tags"]
            writer = csv.DictWriter(csvfile, fieldnames=fieldnames)

            # Populate the output file with the scraped data
            writer.writeheader()
            for quote in quotes:
                writer.writerow(quote)
记得从标准库导入 csv:
import csv完成!至此你的 Pydoll 爬虫已经就绪,可以运行啦。
步骤 #8:整合所有代码
最终,scraper.py 内容大体如下:
import asyncio
from pydoll.browser.chrome import Chrome
from pydoll.constants import By
import csv

async def main():
    async with Chrome() as browser:
        # Launch the Chrome browser and open a new page
        await browser.start()
        page = await browser.get_page()

        # Navigate to the target page
        await page.go_to("https://quotes.toscrape.com/js-delayed/?delay=2000")

        # Wait up to 3 seconds for the quote elements to appear
        await page.wait_element(By.CSS_SELECTOR, ".quote", timeout=3)

        # Where to store the scraped data
        quotes = []

        # Select all quote elements
        quote_elements = await page.find_elements(By.CSS_SELECTOR, ".quote")

        # Iterate over them and scrape data from them
        for quote_element in quote_elements:
            # Extract the quote text (and remove curly quotes)
            text_element = await quote_element.find_element(By.CSS_SELECTOR, ".text")
            text = (await text_element.get_element_text()).replace("“", "").replace("”", "")

            # Extract the author
            author_element = await quote_element.find_element(By.CSS_SELECTOR, ".author")
            author = await author_element.get_element_text()

            # Extract all tags
            tag_elements = await quote_element.find_elements(By.CSS_SELECTOR, ".tag")
            tags = [await tag_element.get_element_text() for tag_element in tag_elements]

            # Populate a new quote with the scraped data
            quote = {
                "text": text,
                "author": author,
                "tags": tags
            }
            # Append the extracted quote to the list
            quotes.append(quote)

    # Export the scraped data to CSV
    with open("quotes.csv", "w", newline="", encoding="utf-8") as csvfile:
                # Add the header
                fieldnames = ["text", "author", "tags"]
                writer = csv.DictWriter(csvfile, fieldnames=fieldnames)

                # Populate the output file with the scraped data
                writer.writeheader()
                for quote in quotes:
                    writer.writerow(quote)

# Execute the async scraping function
asyncio.run(main())
瞧!不到 60 行代码,你就用 Pydoll 完成了一个爬虫机器人。
用以下命令测试脚本:
python scraper.py脚本执行结束后,会在项目文件夹下生成一个 quotes.csv 文件。打开它,就能看到所有爬取到的名句数据:

大功告成!Pydoll 爬虫运作正常。
使用 Pydoll 绕过 Cloudflare
当你在做浏览器自动化时,往往会遇到 常见挑战 之一:WAF(Web 应用防火墙)。比如 Cloudflare,通常会附带反机器人检测功能。
当访问请求被怀疑由自动化脚本发起时,这些防护往往会弹出 CAPTCHA。如果某些网站对所有首次访问用户都启用 CAPTCHA,则更是如此。
在 Python 中绕过 CAPTCHA 并不简单。但有一些方法可让 Cloudflare 认为你是正常用户,从而避免显示 CAPTCHA。Pydoll便提供了一个专门的 API 来处理这种场景。
让我们以 “Antibot Challenge” 测试页面为例:
可以看到,该页面默认都会触发 Cloudflare JavaScript Challenge。只有通过验证后才会显示验证成功的信息。
Pydoll 主要有两种方式来处理 Cloudflare:
我们将分别了解这两种方式。但需要注意的是,正如官方文档所指出的,Cloudflare 绕过并不总是有效,比如 IP 信誉低时可能会失败。
想了解更深入的解决方法,可阅读我们的 绕过 Cloudflare 爬虫教程。
上下文管理器方式
如果想让 Pydoll 同步地自动处理 Cloudflare 反机器人检查,只需使用 expect_and_bypass_cloudflare_captcha() 方法:
import asyncio
from pydoll.browser.chrome import Chrome
from pydoll.constants import By

async def main():
    async with Chrome() as browser:
        # Launch the Chrome browser and open a new page
        await browser.start()
        page = await browser.get_page()

        # Wait for the Cloudflare challenge to be executed
        async with page.expect_and_bypass_cloudflare_captcha():
            # Connect to the Cloudflare-protected page:
            await page.go_to("https://www.scrapingcourse.com/antibot-challenge")
            print("Waiting for Cloudflare anti-bot to be handled...")

        # This code runs only after the anti-bot is successfully bypassed
        print("Cloudflare anti-bot bypassed! Continuing with automation...")

        # Print the text message on the success page
        await page.wait_element(By.CSS_SELECTOR, "#challenge-title", timeout=3)
        success_element = await page.find_element(By.CSS_SELECTOR, "#challenge-title")
        success_text = await success_element.get_element_text()
        print(success_text)

asyncio.run(main())
运行该脚本时,Chrome 窗口会自动绕过挑战并加载目标页面,控制台输出类似:
Waiting for Cloudflare anti-bot to be handled...
Cloudflare anti-bot bypassed! Continuing with automation...
You bypassed the Antibot challenge! :D
后台处理方式
若你不想在 Cloudflare 挑战解决期间暂停脚本执行,可以使用 enable_auto_solve_cloudflare_captcha() 和 disable_auto_solve_cloudflare_captcha(),背景自动处理:
import asyncio
from pydoll.browser import Chrome
from pydoll.constants import By

async def main():
    async with Chrome() as browser:
        # Launch the Chrome browser and open a new page
        await browser.start()
        page = await browser.get_page()

        # Enable automatic captcha solving before navigating
        await page.enable_auto_solve_cloudflare_captcha()

        # Connect to the Cloudflare-protected page:
        await page.go_to("https://www.scrapingcourse.com/antibot-challenge")
        print("Page loaded, Cloudflare anti-bot will be handled in the background...")

        # Disable anti-bot auto-solving when no longer needed
        await page.disable_auto_solve_cloudflare_captcha()

        # Print the text message on the success page
        await page.wait_element(By.CSS_SELECTOR, "#challenge-title", timeout=3)
        success_element = await page.find_element(By.CSS_SELECTOR, "#challenge-title")
        success_text = await success_element.get_element_text()
        print(success_text)

asyncio.run(main())
输出结果类似:
Page loaded, Cloudflare anti-bot will be handled in the background...
You bypassed the Antibot challenge! :D
这种爬虫方法的局限性
无论使用 Pydoll 还是其他 爬虫工具,如果发送的请求量过多,就很容易被目标网站封禁。这往往是因为大多数网站都会进行速率限制(rate limiting),以防止爬虫或机器人占用过多资源。
这是一种典型的 反爬技术 与防止 DDoS 攻击的手段。毕竟没有网站希望被海量自动化流量淹没。
即便你遵守了 robots.txt 这类最佳实践,也可能因为同一 IP 发起的大量请求而遭到封禁,触发 403 Forbidden 或 429 Too Many Requests 错误。
最有效的方式就是使用轮换代理隐藏你的真实 IP。
简单来说,代理是爬虫和目标网站之间的中介。它会将你的请求转发给目标站点,然后把响应转发回来,从而使目标站点只看到代理的 IP,而非你本地环境的 IP。
这种技术不仅可以保护你的真实 IP,还可用于绕过地理限制以及实现更多功能。
目前市面上有多种类型的代理。若想避免封禁,就必须使用高质量的服务商提供的真实轮换代理(rotating proxies),例如 Bright Data。
下一部分会演示如何把 Bright Data 的轮换代理集成到 Pydoll 中,以便在大规模爬取时更加稳定可靠。
将 Pydoll 与 Bright Data 轮换代理集成
Bright Data 拥有业内规模庞大的代理网络,服务客户包括多家世界 500 强企业及超过 20,000 名用户。它的网络包含:
- 数据中心代理 – 超过 770,000 个数据中心 IP
- 住宅代理 – 超过 150,000,000 个住宅 IP,覆盖 195+ 个国家
- ISP 代理 – 超过 700,000 个 ISP IP
- 移动代理 – 超过 7,000,000 个移动 IP
下面演示如何将 Bright Data 的住宅代理与 Pydoll 结合使用。
如果你还没有 Bright Data 账号,可 免费注册。已有账号则直接登录到个人面板:
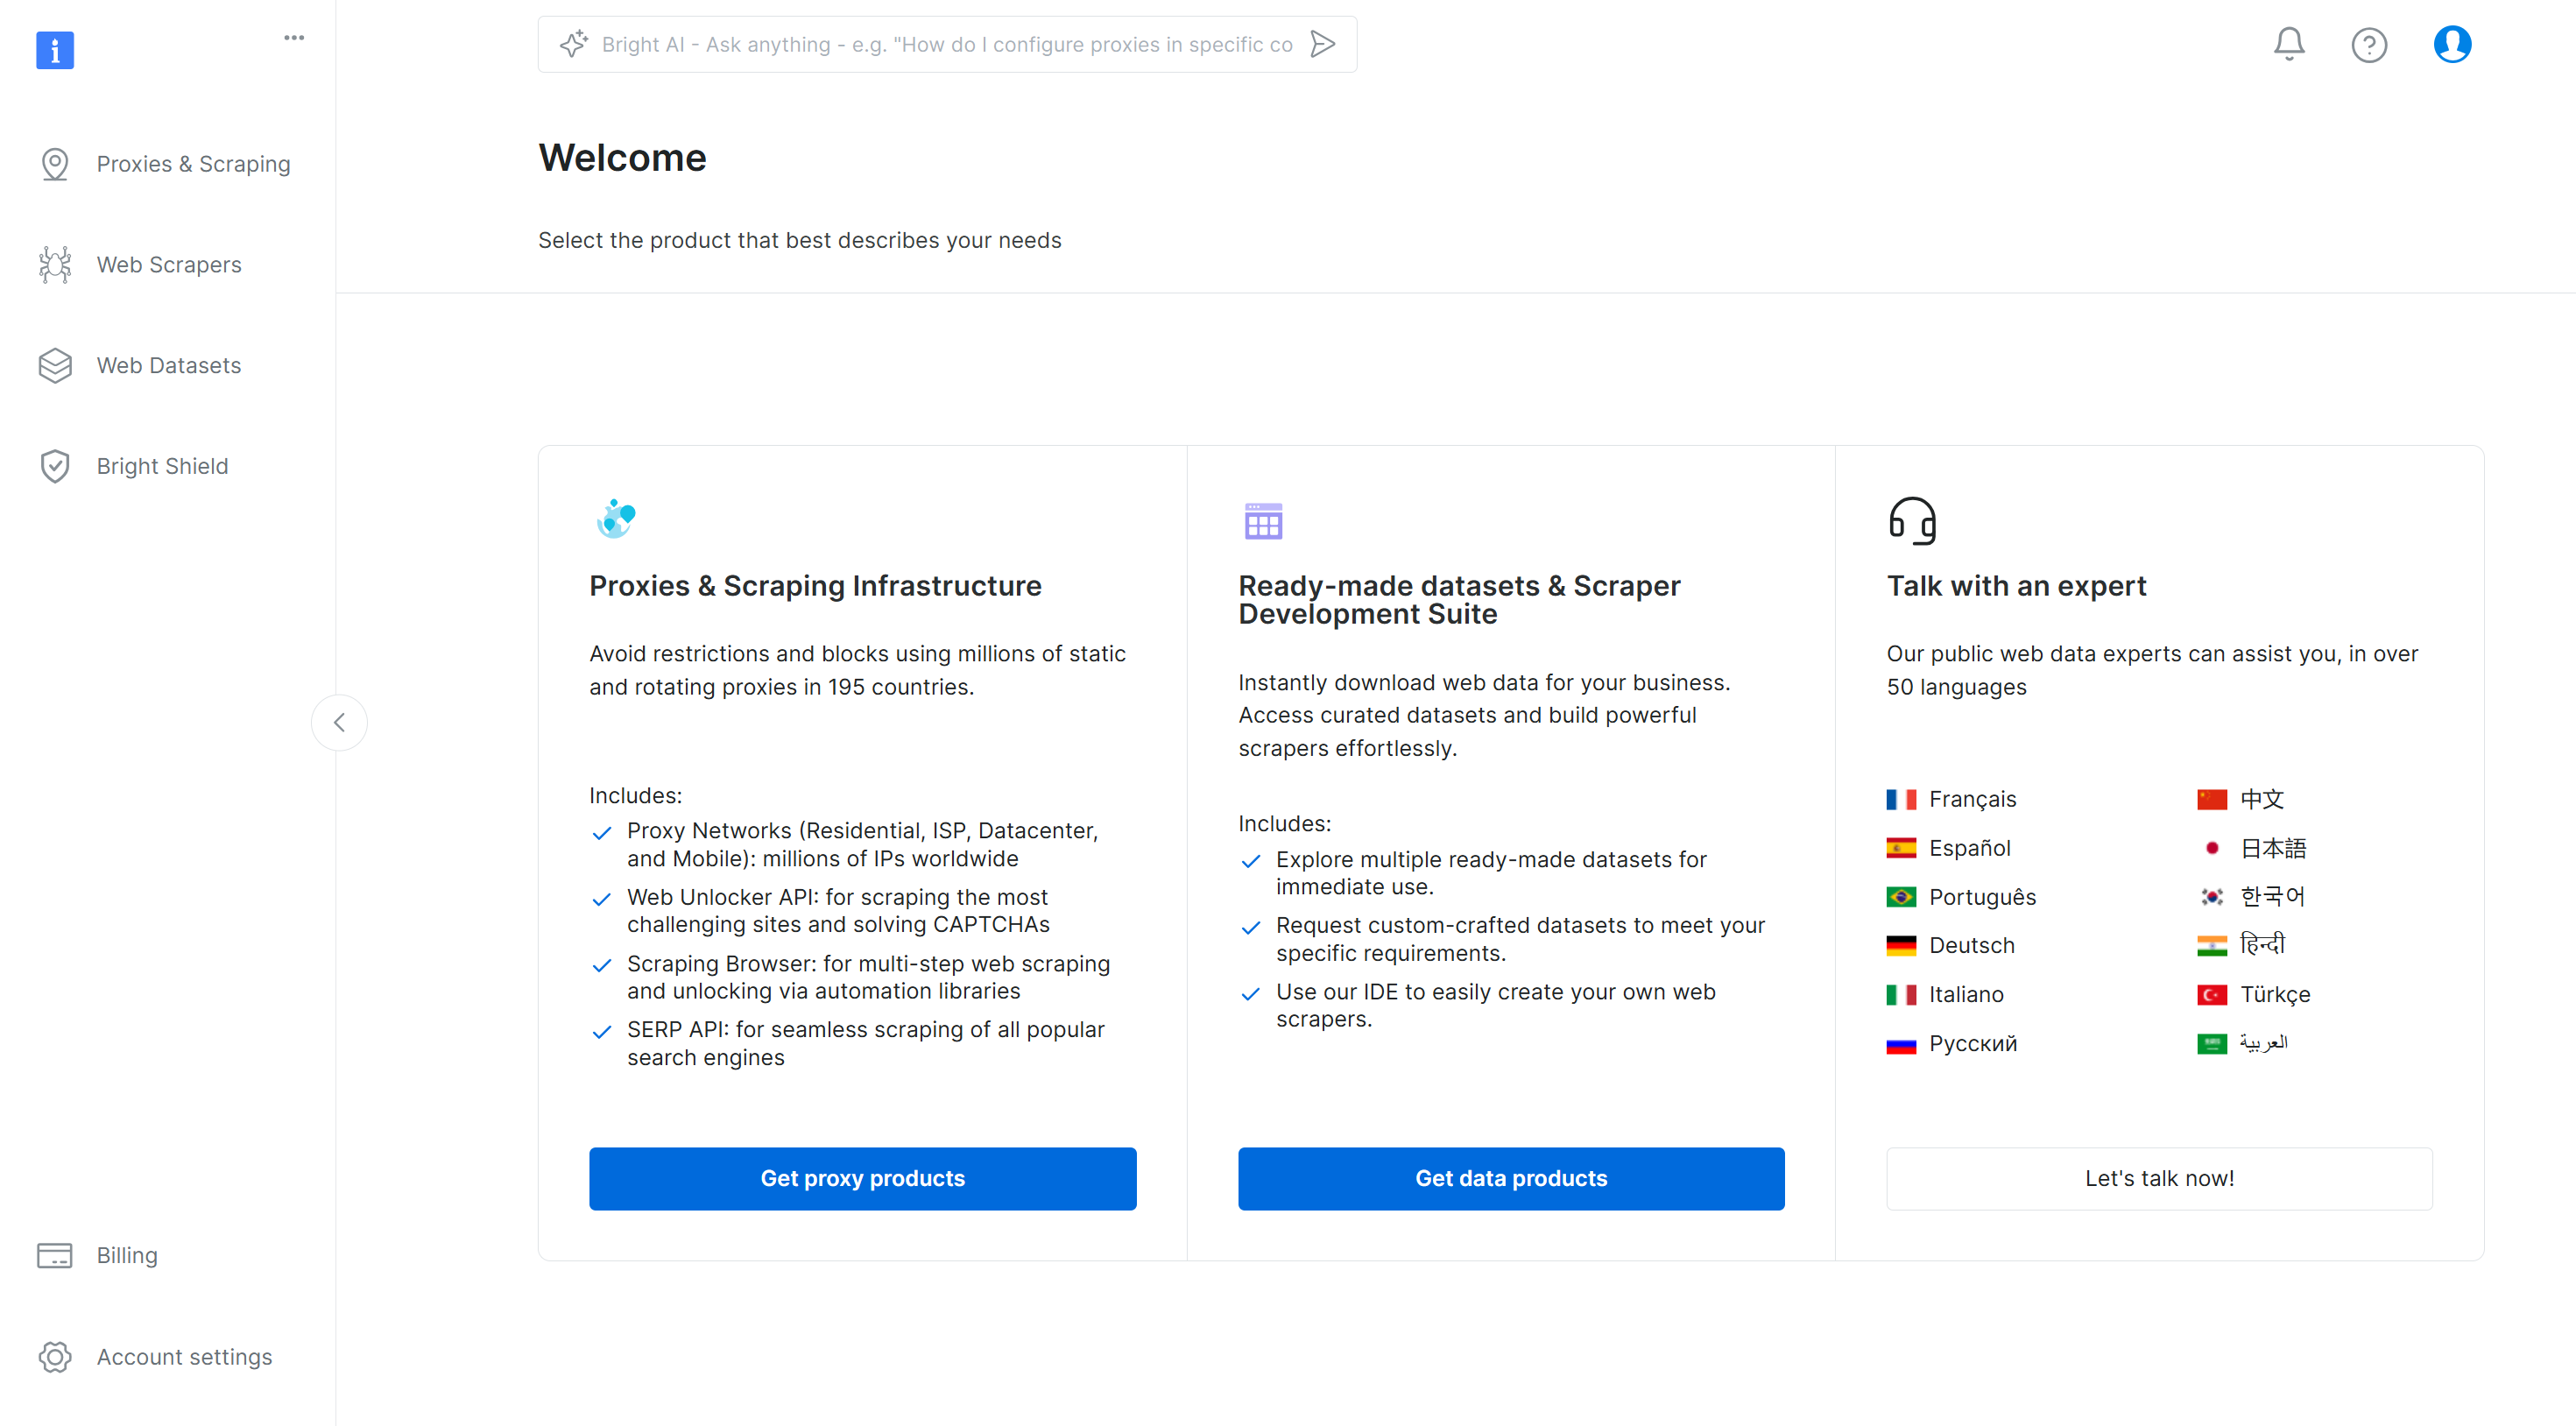
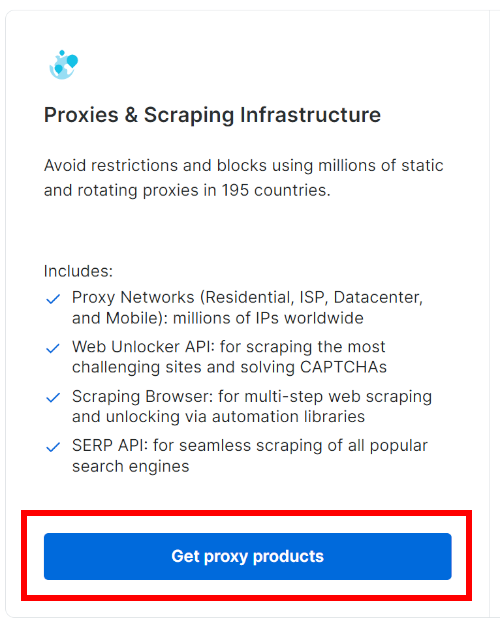
在面板里,点击“Get proxy products”按钮:
随后会跳转到 “Proxies & Scraping Infrastructure” 页面:
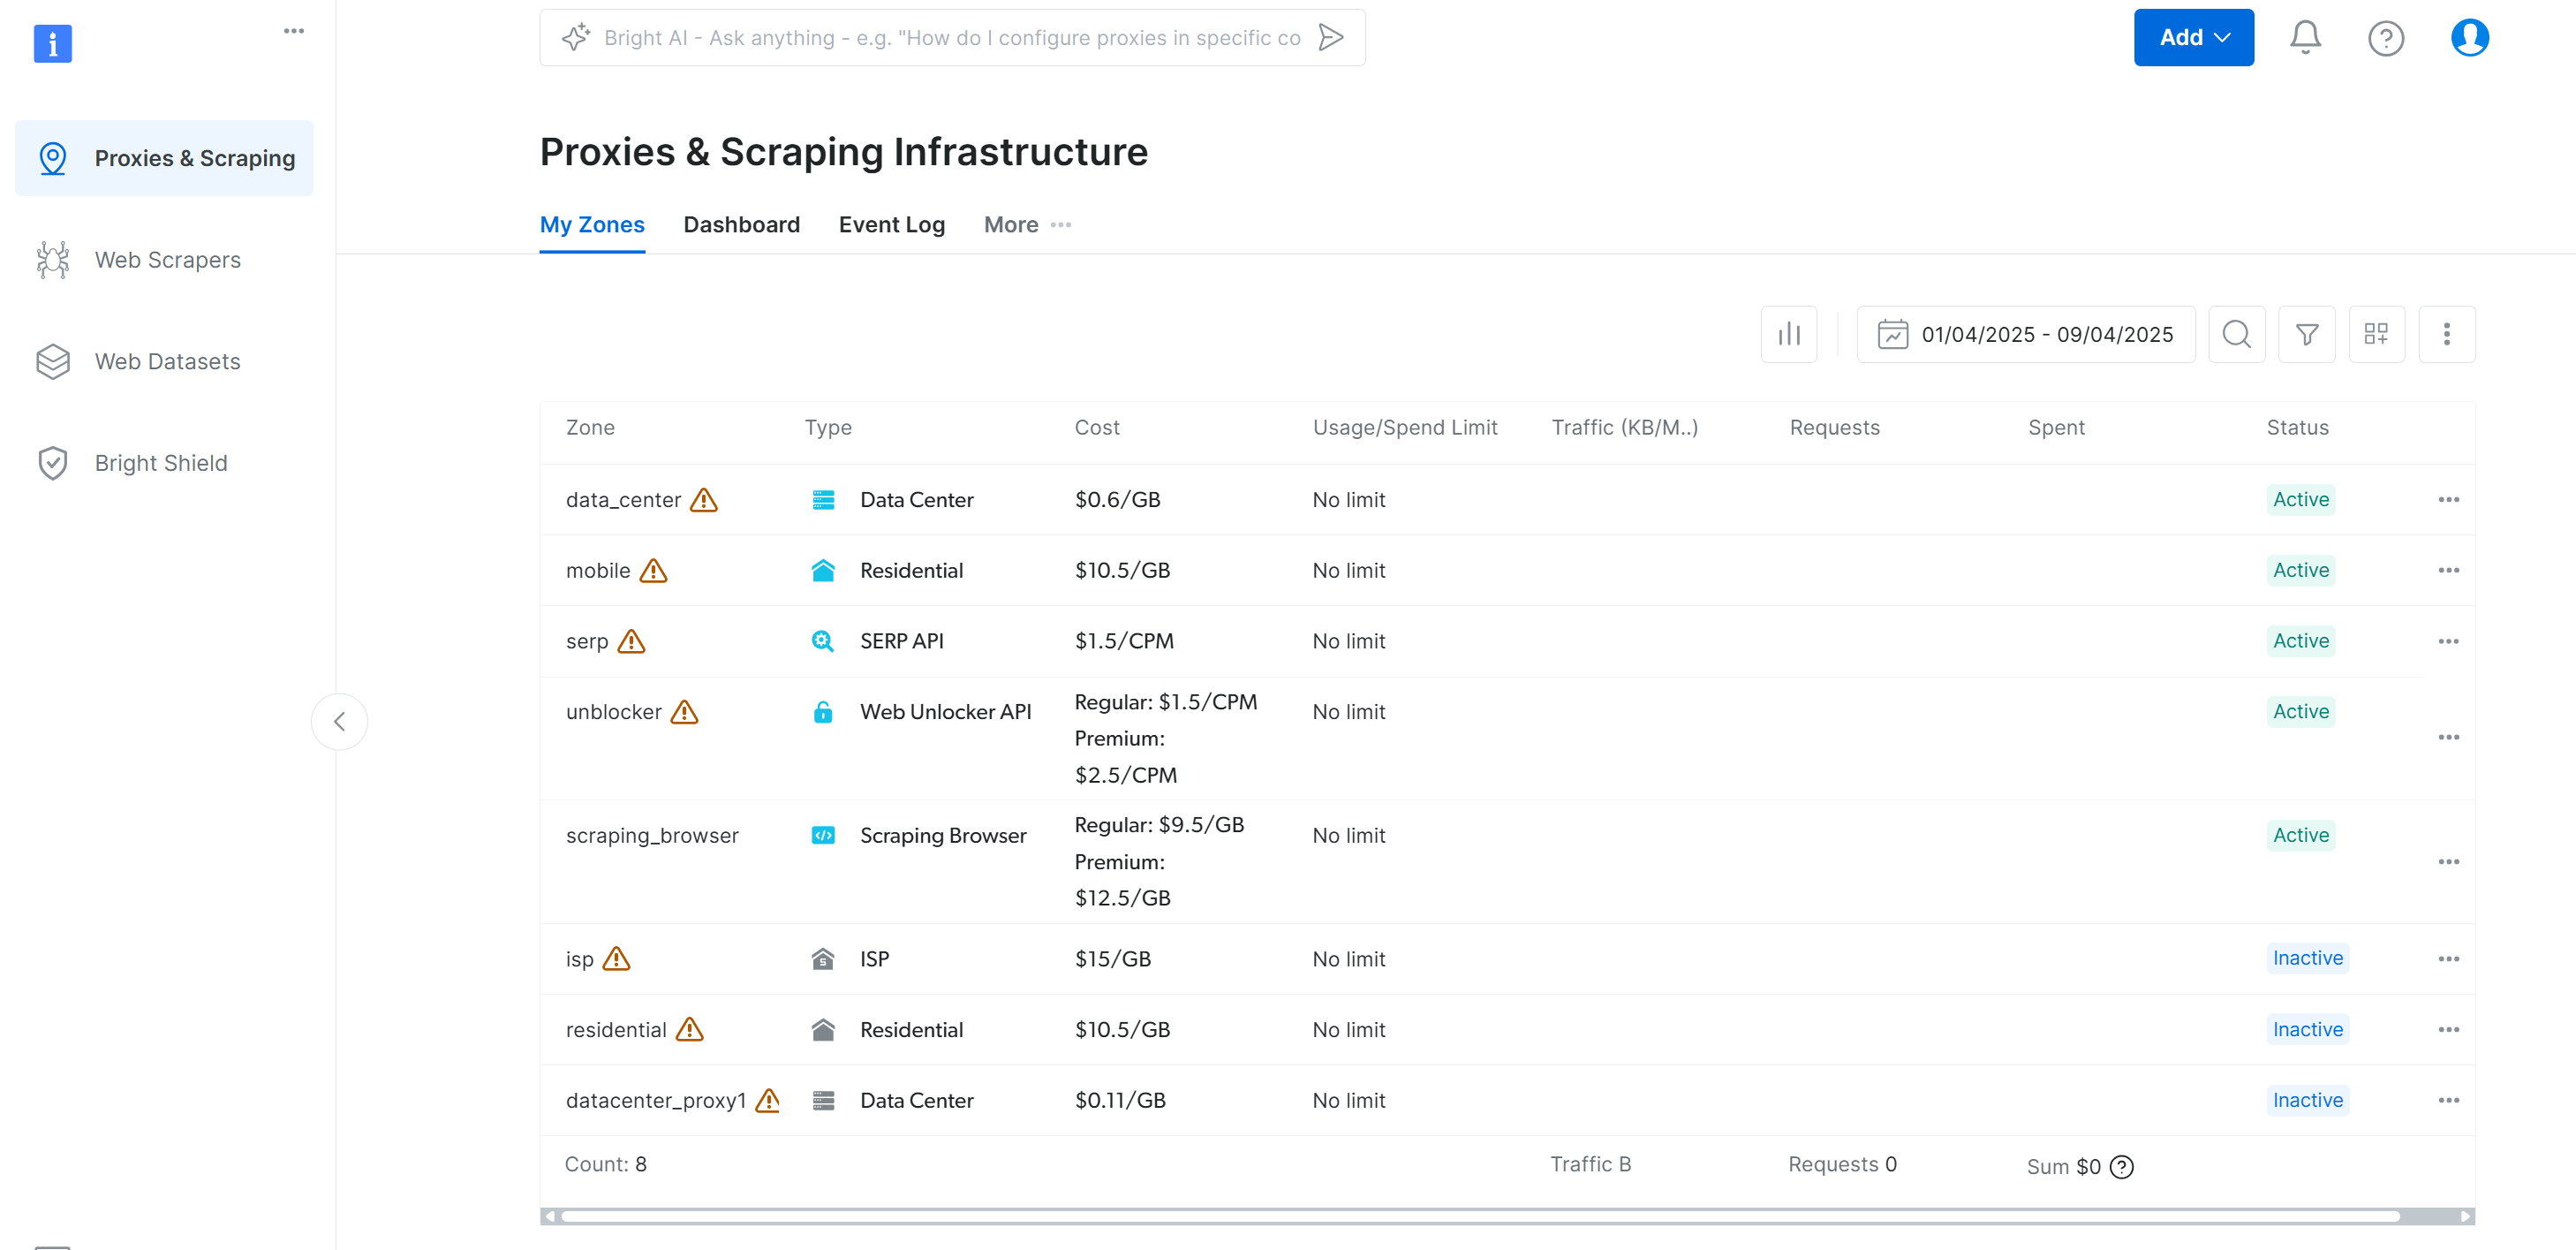
在列表中找到 “Residential” 并点击:
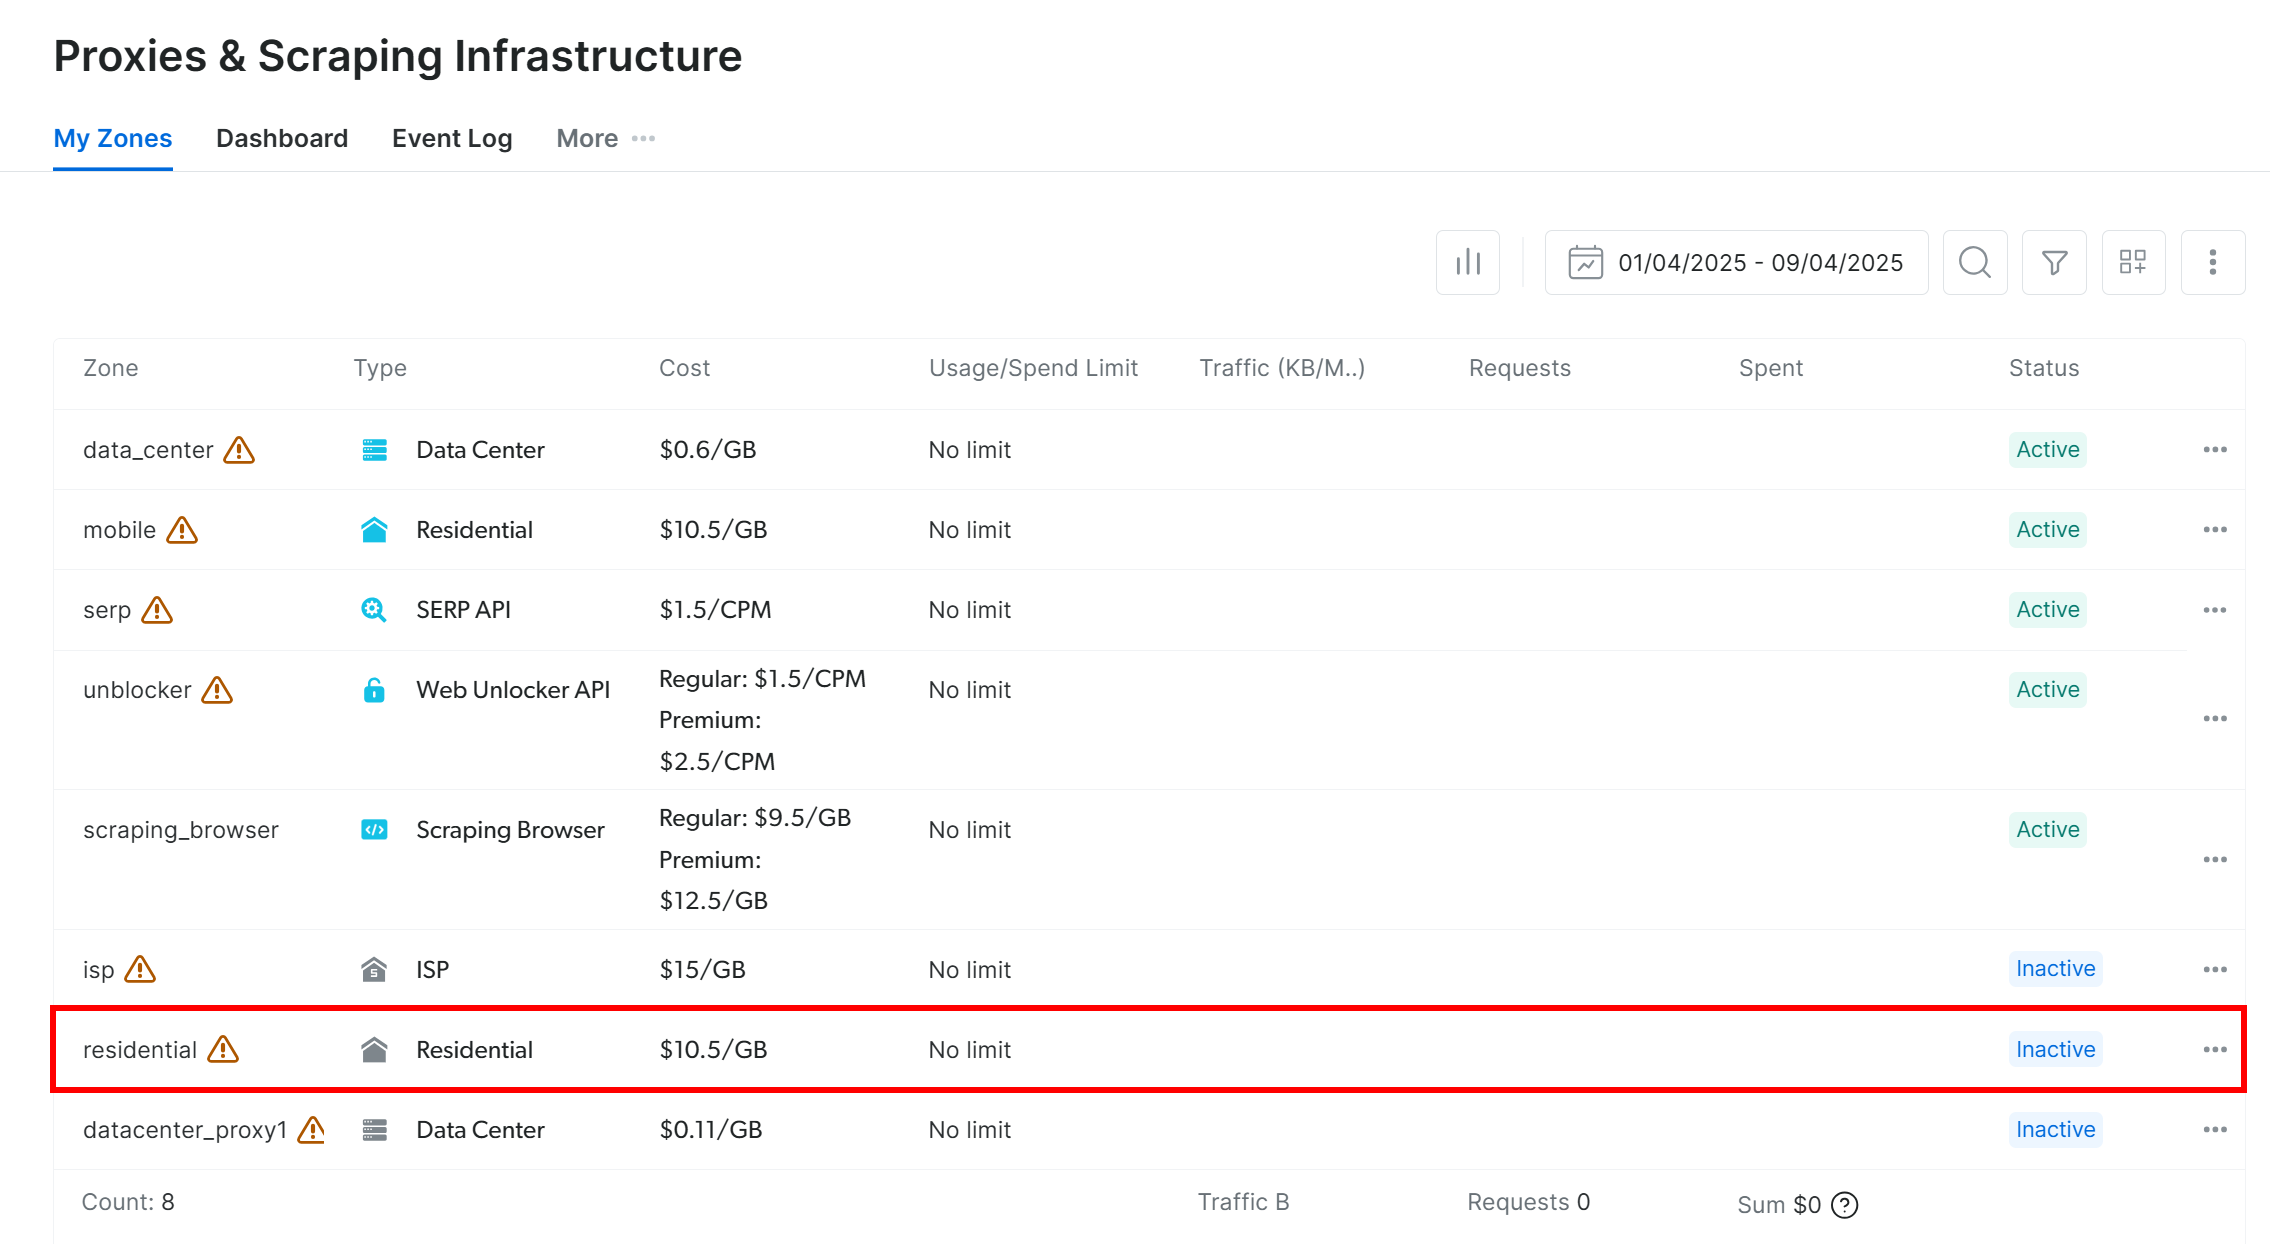
进入住宅代理的设置页面:
如果是首次使用,可根据向导配置代理,也可 联系 24/7 客服 获取帮助。
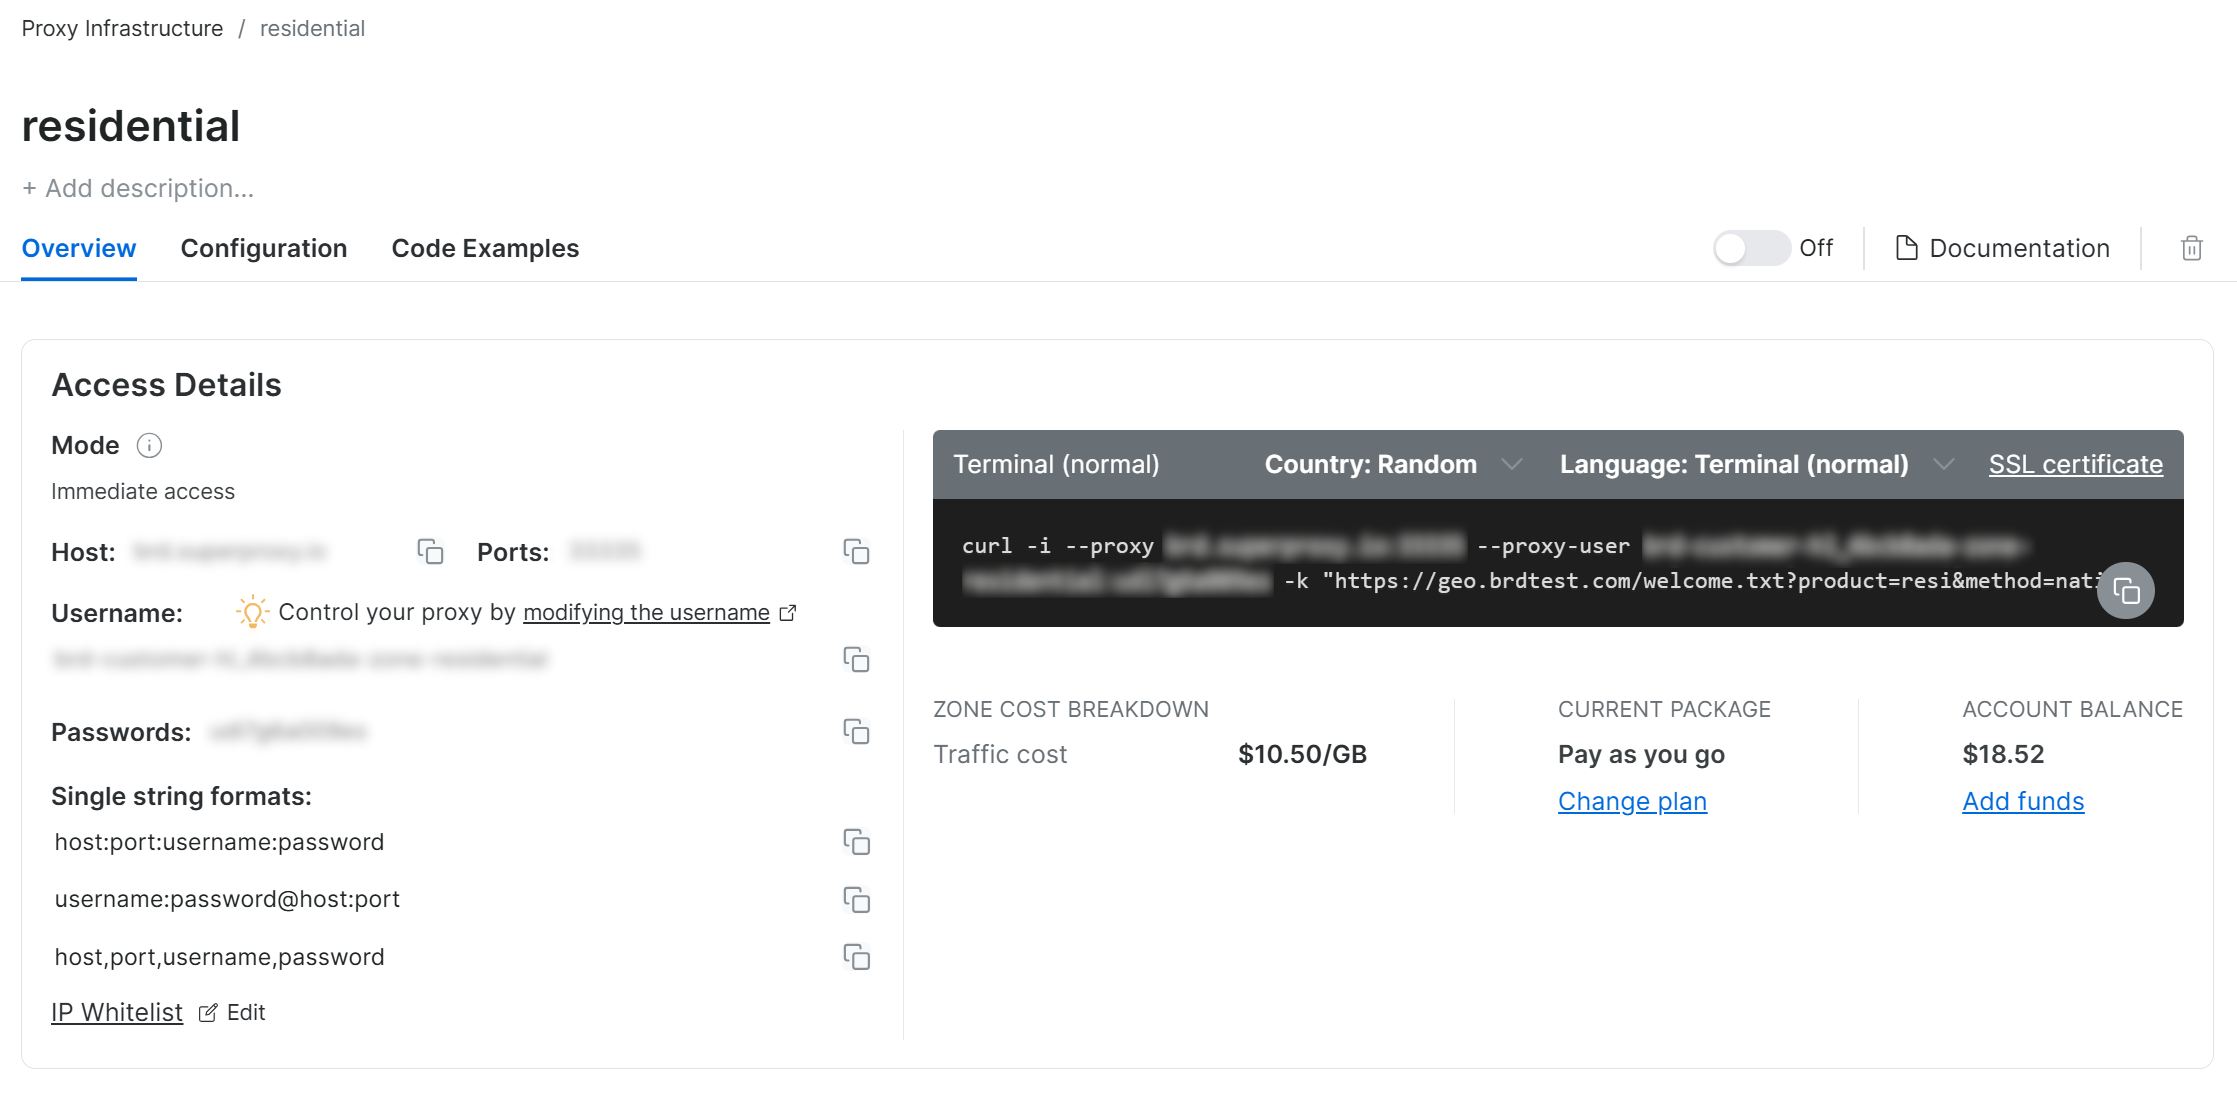
然后,转到 “Overview” 选项卡,可以看到代理的主机、端口、用户名和密码:
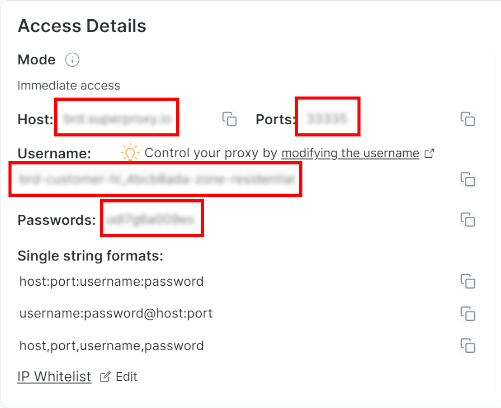
用这些信息构造你的代理 URL:
proxy_url = "<brightdata_proxy_username>:<brightdata_proxy_password>@<brightdata_proxy_host>:<brightdata_proxy_port>";记得把上面的占位符 (<brightdata_proxy_username>, <brightdata_proxy_password>, <brightdata_proxy_host>, <brightdata_proxy_port>) 替换为真实的代理凭证。
最后,别忘了把代理开关从 “Off” 切换到 “On”:

以上完成后,你就可以在 Pydoll 中配置代理了。参考 官方文档,示例如下:
import asyncio
from pydoll.browser.chrome import Chrome
from pydoll.browser.options import Options
from pydoll.constants import By
import traceback

async def main():
    # Create browser options
    options = Options()

    # The URL of your Bright Data proxy
    proxy_url = "<brightdata_proxy_username>:<brightdata_proxy_password>@<brightdata_proxy_host>:<brightdata_proxy_port>" # Replace it with your proxy URL

    # Configure the proxy integration option
    options.add_argument(f"--proxy-server={proxy_url}")

    # To avoid potential SSL errors
    options.add_argument("--ignore-certificate-errors")

    # Start browser with proxy configuration
    async with Chrome(options=options) as browser:
        await browser.start()
        page = await browser.get_page()

        # Visit a special page that returns the IP of the caller
        await page.go_to("https://httpbin.io/ip")

        # Extract the page content containing only the IP of the incoming
        # request and print it
        body_element = await page.find_element(By.CSS_SELECTOR, "body")
        body_text = await body_element.get_element_text()
        print(f"Current IP address: {body_text}")

# Execute the async scraping function
asyncio.run(main())
每次运行该脚本,都可以看到一个不同的出口 IP,这便是 Bright Data 代理轮换的结果。
提示:Chrome 的 --proxy-server 参数默认并不支持带用户名密码的代理,但Pydoll 内置了高级代理管理,可以绕过这一限制,让你顺利使用密码验证的代理服务。
借助 Bright Data 轮换代理,Pydoll 的代理轮换更易用、更可靠且更具可扩展性!
Pydoll 的替代方案
Pydoll 在绕过反机器人、实现浏览器自动化爬虫方面确实强大,但它并不是唯一的工具。
以下是一些可以替代 Pydoll 的优秀框架和库:
- SeleniumBase:基于 Selenium/WebDriver API 的 Python 框架,拥有成熟的自动化测试与爬虫开发生态。
- Undetected ChromeDriver:一定程度上能规避 Imperva、DataDome、Distil Networks 等常见反爬虫服务检测的 “改装版” ChromeDriver,非常适合需要高度防检测的 Selenium 爬虫场景。
如果你想寻找更通用的爬虫解决方案,能支持多种编程语言,并可应用到任意站点,可以看看我们的网页抓取服务:
- 抓取浏览器:与 Selenium、Playwright、Puppeteer 兼容的浏览器,内置专业解锁功能。
- 网络抓取 APIs:可直接从 100+ 主流网站获取结构化数据的预配置接口。
- 网络解锁器:一站式 API,能在遇到反机器人检测时智能解锁。
- SERP API:专用于抓取搜索引擎结果页并完整提取 SERP 数据的服务。
总结
在本代理集成教程中,你了解了 Pydoll 的背景和工作原理,学会了如何使用它在 JavaScript 动态页面上进行爬取,以及如何利用代理来绕过其最大的瓶颈。
同时,你也明白了单纯依靠 Pydoll 而不进行 IP 轮换,往往会面临结果不稳定、易被封禁的问题。想要更稳定的性能、更高的安全性和更好的可扩展性,就需要选择值得信赖的代理服务商。将时间与精力统统省下,直接选择市面上 最优质的代理服务——Bright Data。
立即注册账号,免费试用我们的代理吧!


技术写作
 5.5 years experience
Antonello是一名软件工程师,但他更喜欢称自己为技术传教士。通过写作传播知识是他的使命。