在本指南中,您将学习:
- 什么是 ZoomInfo 抓取器以及它如何工作
- 可以自动从 ZoomInfo 中提取哪些类型的数据
- 如何使用 Python 编写一个 ZoomInfo 抓取脚本
- 何时以及为什么需要更高级的解决方案
让我们开始吧!
什么是 ZoomInfo 抓取器?
ZoomInfo 抓取器是一种用于从 ZoomInfo(一个提供详细公司和专业信息的领先平台)提取数据的工具。它可以自动化抓取过程,让您收集大量数据。该抓取器依赖浏览器自动化等技术来访问网站并获取内容。
您可以从 ZoomInfo 获取哪些数据
以下是您可以从 ZoomInfo 抓取到的一些重要数据:
- 公司信息:公司名称、行业、收入、总部所在地和员工数量。
- 员工信息:姓名、职位名称、电子邮箱和电话号码。
- 行业洞察:竞争对手、市场趋势以及公司层级结构。
使用 Python 抓取 ZoomInfo:分步指南
在本部分中,您将学习如何编写一个 ZoomInfo 抓取器。
我们的目标是带您创建一个 Python 脚本,用来自动从 NVIDIA ZoomInfo 公司页获取数据:
请按照下面的步骤操作!
步骤 #1:项目设置
在开始之前,请确认您的计算机上已安装 Python 3。如果没有, 下载并根据向导完成安装。
现在,使用以下命令为您的项目创建一个文件夹:
mkdir zoominfo-scraperzoominfo-scraper 目录将作为您 Python ZoomInfo 抓取器的项目文件夹。
进入该目录,并在其中初始化一个 虚拟环境:
cd zoominfo-scraper
python -m venv env
在您喜欢的 Python IDE 中加载该项目文件夹。 Visual Studio Code(附加 Python 插件)或 PyCharm Community Edition 均可。
在项目文件夹中创建一个 scraper.py 文件,如下图所示:
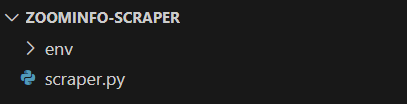
此时,scraper.py 为空。稍后我们会将需要的抓取逻辑写入其中。
在 IDE 的终端中,激活虚拟环境。对于 Linux 或 macOS,执行以下命令:
./env/bin/activate相应地,在 Windows 上执行:
env/Scripts/activate很好,现在您的 Python 环境即可用于网络爬取!
步骤 #2:选择抓取库
在编写代码之前,您需要了解哪些工具最适合实现目标。首先应对目标站点做一个初步测试。方法如下:
- 在浏览器的无痕模式(隐身模式)下打开目标页面,以防止之前储存的 Cookie 和偏好设置影响分析。
- 在页面任意位置右击并选择“Inspect(检查)”,以打开浏览器的开发者工具。
- 切换到“Network(网络)”选项卡。
- 刷新页面,查看“Fetch/XHR”选项卡中的活动。
这样可以帮助您了解页面在渲染时的行为:

在这里,您可以看到页面发出的所有动态 AJAX 请求。仔细检查每个请求,您会发现没有哪一个包含相关数据,这意味着大部分信息已经内嵌在服务器返回的 HTML 文档中。
因此,最容易的做法就是使用 HTTP 客户端和 HTML 解析器来抓取 ZoomInfo。不过,该网站使用了严格的反爬技术,大部分不来源于浏览器的自动化请求都会被阻止。最简单的绕过方式是使用像 Selenium 这样的浏览器自动化工具!
Selenium 允许您以编程方式控制浏览器,指示它像真实用户一样在网页上执行特定动作。是时候安装并使用它了!
步骤 #3:安装并配置 Selenium
在 Python 中,Selenium 通过 selenium pip 包提供。在激活的 Python 虚拟环境中,使用以下命令进行安装:
pip install -U selenium如需如何使用该工具,请参考我们关于 使用 Selenium 进行网络爬取的教程。
在 scraper.py 中导入 Selenium,并初始化一个 WebDriver 对象以控制一个 Chrome 实例:
from selenium import webdriver
from selenium.webdriver.chrome.service import Service

# create a Chrome web driver instance
driver = webdriver.Chrome(service=Service())
上述代码会创建一个 WebDriver 实例,用于在 Chrome 上进行操作。请注意,ZoomInfo 使用的反爬技术会阻止无头浏览器,因此您不能使用 --headless 标志。如果需要替代方案,可考虑使用 Playwright Stealth。
在脚本最后别忘了关闭 WebDriver:
driver.quit()太好了!现在您已经准备好开始抓取 ZoomInfo 了。
步骤 #4:连接到目标页面
使用 Selenium WebDriver 对象的 get() 方法,指示浏览器访问目标页面:
driver.get("https://www.zoominfo.com/c/nvidia-corp/136118787")您的 scraper.py 文件现在应包含以下代码:
from selenium import webdriver
from selenium.webdriver.chrome.service import Service

# create a Chrome web driver instance
driver = webdriver.Chrome(service=Service())

# connect to the target page
driver.get("https://www.zoominfo.com/c/nvidia-corp/136118787")

# scraping logic...

# close the browser
driver.quit()
在结束行处放一个调试断点并运行脚本。您应该能看到以下画面:
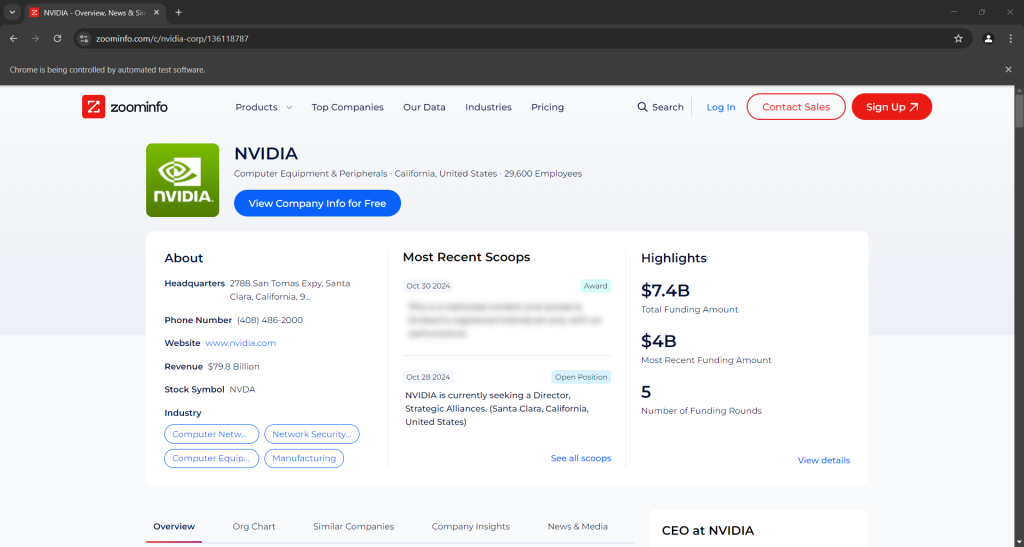
“Chrome 正在被自动测试软件控制”这条消息就表明,Selenium 成功地在控制 Chrome。干得好!
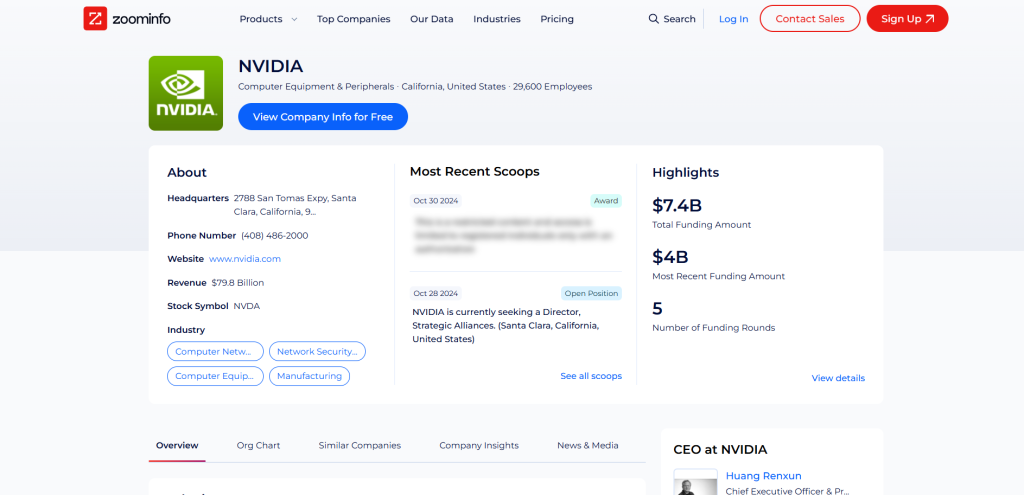
步骤 #5:抓取公司概览信息
您需要分析页面的 DOM 结构,以获取所需数据。目标是定位包含目标数据的 HTML 元素。从公司信息部分的顶部开始:
的-HTML.png)
<app-company-header> 元素中包含:
- 带有类名
company-logo-wrapper的<div>标签内的公司图像<img>标签。 - 类名为
company-name的节点中存储的公司名称。 - 类名为
company-header-subtitle的节点中存储的公司子标题。
使用 Selenium 定位这些元素并从中获取数据:
logo_element = driver.find_element(By.CSS_SELECTOR, ".company-logo-wrapper img")
logo_url = logo_element.get_attribute("src")

name_element = driver.find_element(By.CSS_SELECTOR, ".company-name")
name = name_element.text

subtitle_element = driver.find_element(By.CSS_SELECTOR, ".company-header-subtitle")
subtitle = subtitle_element.text
别忘了导入 By:
from selenium.webdriver.common.by import By请注意,find_element() 方法会根据您指定的元素选择策略来查找并返回节点。上文采用的是 CSS 选择器。了解更多信息请参考 XPath 与 CSS 选择器的区别。
接着您可以通过该节点的 text 属性获取文本内容,或者通过 get_attribute() 方法来获取某个属性的值。
打印所抓取的数据:
print(logo_url)
print(name)
print(subtitle)
结果如下:
https://res.cloudinary.com/zoominfo-com/image/upload/w_120,h_120,c_fit/nvidia.com
NVIDIA
Computer Equipment & Peripherals · California, United States · 29,600 Employees
太棒了!ZoomInfo 抓取器运行良好。
步骤 #6:抓取“关于”信息
接下来我们关注公司页面上的 “About” 部分:
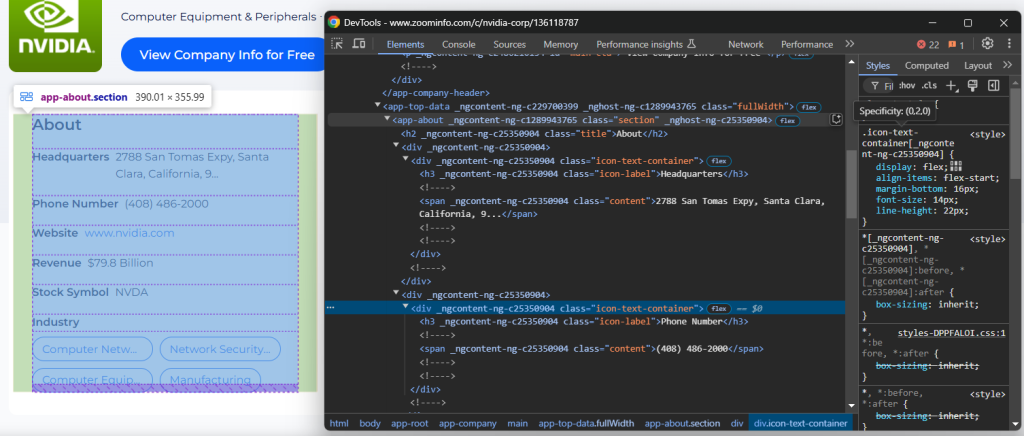
<app-about> 节点中包含的元素带有一些通用类名及似乎是随机生成的属性。由于这些属性可能会在每次版本更新时改变,因此应避免依赖它们来定位节点进行爬取。
要抓取此部分的信息,可以先选择到 <app-about> 节点:
about_element = driver.find_element(By.CSS_SELECTOR, "app-about")接着,关注 .icon-text-container 这些元素,并查看其中的 label(.icon-label),以识别所需的元素。如果 label 符合,则从 .content 元素中提取数据。将此逻辑封装成函数:
def scrape_about_node(text_container_elements, text_label):
  # iterate through them to scrape data from the
  # specific nodes of interest
  for text_container_element in text_container_elements:
      label = text_container_element.find_element(By.CSS_SELECTOR, ".icon-label").text.strip()
      if label == text_label:
          # select the content element and extract data from it
          content_element = text_container_element.find_element(By.CSS_SELECTOR, ".content")
          return content_element.text

  return None
然后就能通过以下代码来抓取 “About” 部分的信息:
headquarters = scrape_about_node(text_container_elements, "Headquarters")
phone_number = scrape_about_node(text_container_elements, "Phone Number")
revenue = scrape_about_node(text_container_elements, "Revenue")
stock_symbol = scrape_about_node(text_container_elements, "Stock Symbol")
接下来,定位行业信息和公司标签。
使用 h3 .incon-label 选择行业,使用 zi-directories-chips a 选择标签。如下代码实现数据抓取:
industry_element = about_element.find_element(By.CSS_SELECTOR, "h3.icon-label")
industry = industry_element.text

tag_elements = about_element.find_elements(By.CSS_SELECTOR, "zi-directories-chips a")
tags = [tag_element.text for tag_element in tag_elements]
太好了!我们的 ZoomInfo 数据抓取逻辑已经完成。
步骤 #7:收集所抓取的数据
当前抓取的数据分别保存在不同的变量中。将它们组合到一个 company 对象中:
company = {
    "logo_url": logo_url,
    "name": name,
    "subtitle": subtitle,
    "headquarters": headquarters,
    "phone_number": phone_number,
    "revenue": revenue,
    "stock_symbol": stock_symbol,
    "industry": industry,
    "tags": tags
}
打印这个对象,确认所抓取的数据是否符合预期:
print(items)输出示例:
{'logo_url': 'https://res.cloudinary.com/zoominfo-com/image/upload/w_120,h_120,c_fit/nvidia.com', 'name': 'NVIDIA', 'subtitle': 'Computer Equipment & Peripherals · California, United States · 29,600 Employees', 'headquarters': '2788 San Tomas Expy, Santa Clara, California, 95051, United States', 'phone_number': '(408) 486-2000', 'revenue': '$79.8 Billion', 'stock_symbol': 'NVDA', 'industry': 'Headquarters', 'tags': ['Computer Networking Equipment', 'Network Security Hardware & Software', 'Computer Equipment & Peripherals', 'Manufacturing']}完美!现在只需将此信息导出为 JSON 等易于阅读的文件即可。
步骤 #8:导出为 JSON
通过以下方式将 company 导出到 company.json 文件:
with open("company.json", "w") as json_file:
json.dump(company, json_file, indent=4)首先,open() 会创建一个名为 company.json 的输出文件,然后 json.dump() 将 company 转化为 JSON 表示并写入该文件。
记得从 Python 标准库 json 模块中导入 json:
import json步骤 #9:整合所有代码
以下是最终的 scraper.py 文件:
from selenium import webdriver
from selenium.webdriver.chrome.service import Service
from selenium.webdriver.common.by import By
import json

def scrape_about_node(text_container_elements, text_label):
    # iterate through them to scrape data from the
    # specific nodes of interest
    for text_container_element in text_container_elements:
        label = text_container_element.find_element(By.CSS_SELECTOR, ".icon-label").text.strip()
        if label == text_label:
            # select the content element and extract data from it
            content_element = text_container_element.find_element(By.CSS_SELECTOR, ".content")
            return content_element.text

    return None

# create a Chrome web driver instance
driver = webdriver.Chrome(service=Service())

# connect to the target page
driver.get("https://www.zoominfo.com/c/nvidia-corp/136118787")

# scrape the company info
logo_element = driver.find_element(By.CSS_SELECTOR, ".company-logo-wrapper img")
logo_url = logo_element.get_attribute("src")

name_element = driver.find_element(By.CSS_SELECTOR, ".company-name")
name = name_element.text

subtitle_element = driver.find_element(By.CSS_SELECTOR, ".company-header-subtitle")
subtitle = subtitle_element.text

# scrape data from the "About" section
about_element = driver.find_element(By.CSS_SELECTOR, "app-about")

text_container_elements = about_element.find_elements(By.CSS_SELECTOR, ".icon-text-container")

headquarters = scrape_about_node(text_container_elements, "Headquarters")
phone_number = scrape_about_node(text_container_elements, "Phone Number")
revenue = scrape_about_node(text_container_elements, "Revenue")
stock_symbol = scrape_about_node(text_container_elements, "Stock Symbol")

# scrape the company industry and tags
industry_element = about_element.find_element(By.CSS_SELECTOR, "h3.icon-label")
industry = industry_element.text

tag_elements = about_element.find_elements(By.CSS_SELECTOR, "zi-directories-chips a")
tags = [tag_element.text for tag_element in tag_elements]

# collect the scraped data
company = {
    "logo_url": logo_url,
    "name": name,
    "subtitle": subtitle,
    "headquarters": headquarters,
    "phone_number": phone_number,
    "revenue": revenue,
    "stock_symbol": stock_symbol,
    "industry": industry,
    "tags": tags
}

# export the scraped data to JSON
with open("company.json", "w") as json_file:
  json.dump(company, json_file, indent=4)

# close the browser
driver.quit()
只用了 70 多行代码,您就构建了一个使用 Python 抓取 ZoomInfo 数据的脚本!
使用以下命令来运行此抓取器:
python3 script.py或在 Windows 上:
python script.py在项目文件夹中会出现一个 company.json 文件。打开它,您将看到:
{
    "logo_url": "https://res.cloudinary.com/zoominfo-com/image/upload/w_120,h_120,c_fit/nvidia.com",
    "name": "NVIDIA",
    "subtitle": "Computer Equipment & Peripherals · California, United States · 29,600 Employees",
    "headquarters": "2788 San Tomas Expy, Santa Clara, California, 95051, United States",
    "phone_number": "(408) 486-2000",
    "revenue": "$79.8 Billion",
    "stock_symbol": "NVDA",
    "industry": "Headquarters",
    "tags": [
        "Computer Networking Equipment",
        "Network Security Hardware & Software",
        "Computer Equipment & Peripherals",
        "Manufacturing"
    ]
}
恭喜,任务完成!
轻松获取 ZoomInfo 数据
ZoomInfo 提供的远不止公司概览——它包含了大量有用的信息。难点在于,抓取这些数据颇具挑战,因为大部分 ZoomInfo 域下的页面都使用了反爬措施。
如果您尝试使用 Selenium 或其他浏览器自动化工具访问这些页面,很可能会遇到 CAPTCHA 阻拦您的尝试。
第一步可参考我们关于 如何在 Python 中绕过 CAPTCHA的指南。然而,您仍可能面临 429 Too Many Requests 错误,因为该站点限制请求频率。此时可考虑 给 Selenium 集成代理 以轮转出口 IP。
以上问题说明,没有合适工具的话,抓取 ZoomInfo 会是一个令人头疼的过程。再加上您不能使用 无头浏览器,脚本的性能会更慢且消耗更多资源。
解决方案?使用 Bright Data 的 ZoomInfo Scraper API,只需简单的 API 调用即可从目标站点获取数据,而且不会被封锁!
总结
通过此分步教程,您了解了什么是 ZoomInfo 抓取器、它能获取哪些数据,以及如何用不到 100 行的 Python 代码来抓取 ZoomInfo 上的公司概览信息。
挑战在于 ZoomInfo 使用了严格的反爬手段,包括 CAPTCHA、浏览器指纹检测以及 IP 封禁等,来阻挡自动化脚本。借助我们专用的 ZoomInfo Scraper API,您即可免去所有此类障碍。
如果您不想自己编写爬虫,但仍有兴趣获取公司或员工的数据,也可以探索我们的 ZoomInfo 数据集!
现在就注册一个免费 Bright Data 账户来尝试我们的抓取 API 或探索我们的数据集吧。


技术写作
 5.5 years experience
Antonello是一名软件工程师,但他更喜欢称自己为技术传教士。通过写作传播知识是他的使命。