在本指南中,您将学到以下内容:
- AIOHTTP 库简介及其主要功能
- 使用 AIOHTTP 进行网页抓取的分步说明
- 使用 AIOHTTP 进行网页抓取的高级技巧
- AIOHTTP 与 Requests 在处理自动请求方面的异同
现在就来一探究竟吧!
什么是 AIOHTTP?
AIOHTTP 是基于 Python 的 asyncio 构建的异步 HTTP 客户端/服务器框架。不同于传统的 HTTP 客户端,AIOHTTP 使用客户端会话在多个请求之间保持连接。这使它成为处理基于会话的高并发任务的有效工具。
⚙️ 功能
- 支持 HTTP 协议的客户端和服务器端操作。
- 为 WebSockets(客户端和服务器端)提供原生支持。
- 为网络服务器提供中间件和可插拔路由。
- 可高效处理大量的流式数据。
- 此外,还有实现客户端会话持久化、实现连接复用、减少多请求处理开销等功能。
使用 AIOHTTP 进行抓取:分步教程
在网络抓取流程中,AIOHTTP 只是用于获取网页原始 HTML 内容的 HTTP 客户端。要解析并提取 HTML 中的数据,您还需要 BeautifulSoup 之类的 HTML 解析器。
请按照本部分的教程,学习如何使用 AIOHTTP 和 BeautifulSoup 进行网页抓取!
警告:尽管 AIOHTTP 主要用于抓取流程的初始阶段,但本教程将指导您完成整个抓取工作流程。如您想要了解更高级的 AIOHTTP 网页抓取技巧,请直接跳至步骤 3 后的内容。
步骤 #1:设置抓取项目
开始前,请先确保您的电脑已安装 Python 3 或更高版本。如未安装,请从官方网站下载软件并按照说明进行安装。
然后,使用下方命令为您的 AIOHTTP 抓取项目创建目录:
mkdir aiohttp-scraper导航至该目录并设置虚拟环境:
cd aiohttp-scraper
python -m venv env
在您喜欢的 Python IDE 中打开项目文件夹。带有 Python 扩展的 Visual Studio Code 或 PyCharm Community Edition 都是不错的选择。
现在,在项目文件夹中创建 scraper.py 文件。该文件目前仍是空脚本,但很快就会添加抓取逻辑。
在您的 IDE 终端中,激活虚拟环境。如在 Linux 或 macOS 系统上,则使用以下命令:
./env/bin/activate如在 Windows 系统上,则运行下方命令:
env/Scripts/activate非常好!抓取项目已设置完毕,可以进入下一步骤。
步骤 #2:设置抓取库
在已激活的虚拟环境中,使用以下命令安装 AIOHTTP 和 BeautifulSoup:
pip install aiohttp beautifulsoup4这可以将 aiohttp 和 beautifulsoup4 都添加至项目的依赖项中。
将它们导入 scraper.py 脚本:
import asyncio
import aiohttp
from bs4 import BeautifulSoup
注意,您需要将 aiohttp 和 asyncio 搭配使用,才能进行抓取。
现在,将下方的 async 函数工作流添加至 scrper.py 文件:
async def scrape_quotes():
    # Scraping logic...

# Run the asynchronous function
asyncio.run(scrape_quotes())
其中的 scrape_quotes() 用于定义一个异步函数,从而实现抓取逻辑的并发运行,不会发生阻塞。最后,代码中的 asyncio.run(scrape_quotes()) 用于启动并运行该异步函数。
太棒了!您现在可以进入抓取工作流程的下一步了。
步骤 #3:获取目标网页的 HTML 内容
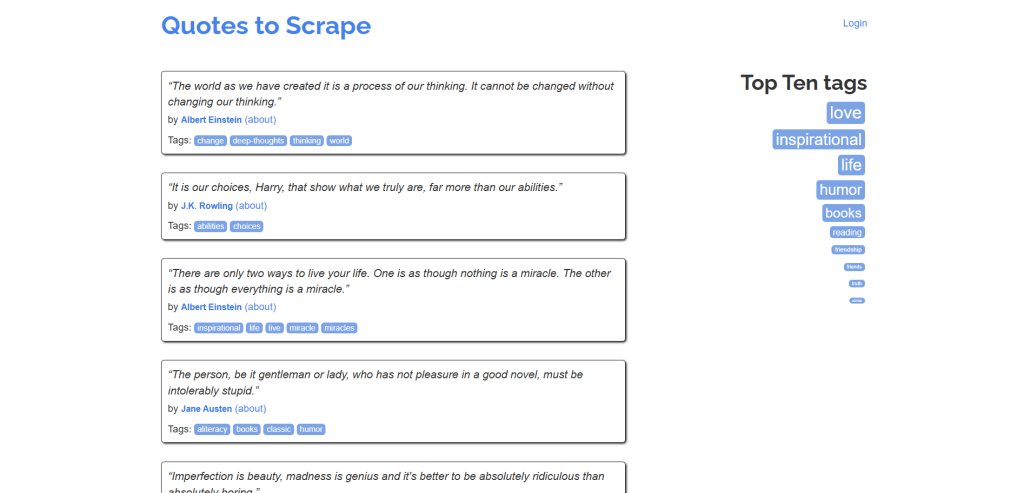
在本示例中,您将看到从 “Quotes to Scrape” 网站抓取数据的详细操作:
有了 Requests 或 AIOHTTP 等库,您只需发出 GET 请求就能直接收到网页的 HTML 内容。但 AIOHTTP 遵循不同的请求生命周期。
AIOHTTP 的主要组件是 ClientSession,它管理着一个连接池并默认支持 Keep-Alive。它不会为每个请求都打开一个新连接,而是复用连接,从而提高性能。
在发起请求时,该流程通常包含三个步骤:
- 通过
ClientSession()打开会话。 - 使用
session.get()异步发送 GET 请求。 - 使用
await response.text()等方法访问响应数据。
这种设计让事件循环可以在操作之间使用不同的 with 上下文,不会发生阻塞,因此非常适合高并发任务。
鉴于此,您可通过以下逻辑使用 AIOHTTP 获取主页的 HTML:
async with aiohttp.ClientSession() as session:
    async with session.get("http://quotes.toscrape.com") as response:
        # Access the HTML of the target page
        html = await response.text()
AIOHTTP 会在后台向服务器发送请求,并等待含有网页 HTML 内容的响应。收到响应后,await response.text() 会将 HTML 内容提取为字符串。
打印 html 变量,您将看到:
<!DOCTYPE html>
<html lang="en">
<head>
    <meta charset="UTF-8">
    <title>Quotes to Scrape</title>
    <link rel="stylesheet" href="/static/bootstrap.min.css">
    <link rel="stylesheet" href="/static/main.css">
</head>
<body>
    <!-- omitted for brevity... -->
</body>
</html>
很棒!您已成功获取目标网页的 HTML 内容。现在可以解析这些内容并提取所需数据了。
步骤 #4:解析 HTML 内容
将 HTML 内容传入 BeautifulSoup 构造函数,以进行解析:
# Parse the HTML content using BeautifulSoup
soup = BeautifulSoup(html, "html.parser")
html.parser 是用于处理内容的默认 Python HTML 解析器。
soup 对象包含解析后的 HTML 内容,并提供提取所需数据的方法。
AIOHTTP 已处理获取的 HTML 内容,现在,您将进入使用 BeautifulSoup 进行数据解析的常规操作阶段。如欲了解更多信息,请参阅有关使用 BeautifulSoup 进行网页抓取的教程。
步骤 #5:写入数据提取逻辑
您可使用以下代码从目标网页抓取引言 (quotes) 数据:
# Where to store the scraped data
quotes = []

# Extract all quotes from the page
quote_elements = soup.find_all("div", class_="quote")

# Loop through quotes and extract text, author, and tags
for quote_element in quote_elements:
    text = quote_element.find("span", class_="text").get_text().get_text().replace("“", "").replace("”", "")
    author = quote_element.find("small", class_="author")
    tags = [tag.get_text() for tag in quote_element.find_all("a", class_="tag")]

    # Store the scraped data
    quotes.append({
        "text": text,
        "author": author,
        "tags": tags
    })
此代码片段用于初始化名为 quotes 的列表,以保存抓取的数据。然后,它会识别并循环遍历所有的引言 HTML 元素,以提取引言文本、作者和标签。每一条被提取出来的引言都会以字典形式存储至 quotes 列表,从而让数据变得有序、结构化,便于后续使用或导出。
太棒了!现在已实现抓取逻辑。
步骤 #6:导出抓取的数据
使用下方代码将抓取的数据导出为 CSV 文件:
# Open the file for export
with open("quotes.csv", mode="w", newline="", encoding="utf-8") as file:
    writer = csv.DictWriter(file, fieldnames=["text", "author", "tags"])

    # Write the header row
    writer.writeheader()

    # Write the scraped quotes data
    writer.writerows(quotes)
上述代码片段用于以写入模式打开名为 quotes.csv 的文件。然后,系统会根据该代码片段设置列标头(text、author、tags),写入标头并将 quotes 列表中的每个字典写入 CSV 文件。
代码中的 csv.DictWriter 用于简化数据格式,使结构化数据的存储变得更容易。要实现上述目的,您务必要从 Python 标准库中导入 csv:
import csv步骤 #7:整合所有代码
您的 AIOHTTP 网页抓取脚本最终应如下所示:
import asyncio
import aiohttp
from bs4 import BeautifulSoup
import csv

# Define an asynchronous function to make the HTTP GET request
async def scrape_quotes():
    async with aiohttp.ClientSession() as session:
        async with session.get("http://quotes.toscrape.com") as response:
            # Access the HTML of the target page
            html = await response.text()

            # Parse the HTML content using BeautifulSoup
            soup = BeautifulSoup(html, "html.parser")

            # List to store the scraped data
            quotes = []

            # Extract all quotes from the page
            quote_elements = soup.find_all("div", class_="quote")

            # Loop through quotes and extract text, author, and tags
            for quote_element in quote_elements:
                text = quote_element.find("span", class_="text").get_text().replace("“", "").replace("”", "")
                author = quote_element.find("small", class_="author").get_text()
                tags = [tag.get_text() for tag in quote_element.find_all("a", class_="tag")]

                # Store the scraped data
                quotes.append({
                    "text": text,
                    "author": author,
                    "tags": tags
                })

            # Open the file name for export
            with open("quotes.csv", mode="w", newline="", encoding="utf-8") as file:
                writer = csv.DictWriter(file, fieldnames=["text", "author", "tags"])

                # Write the header row
                writer.writeheader()

                # Write the scraped quotes data
                writer.writerows(quotes)

# Run the asynchronous function
asyncio.run(scrape_quotes())
您可使用下方命令运行该脚本:
python scraper.py
或者,如使用的是 Linux/macOS 系统,则通过下方命令执行脚本:
python3 scraper.py
您的项目根文件夹中将出现 quotes.csv 文件。打开此文件后,您会看到:

大功告成!您已了解如何使用 AIOHTTP 和 BeautifulSoup 进行网页抓取。
使用 AIOHTTP 进行网页抓取:高级功能和技巧
您现在已了解使用 AIOHTTP 进行网页抓取的基本操作,可以继续学习更高级的技巧了。
下方示例以 HTTPBin.io /anything 端点为目标网站。这是一个非常方便的 API,可返回请求者发送的 IP 地址、标头和其他数据。
准备好掌握 AIOHTTP 网页抓取技巧吧!
设置自定义标头
您可在 AIOHTTP 请求中使用 headers 实参来指定自定义标头:
import aiohttp
import asyncio

async def fetch_with_custom_headers():
    # Custom headers for the request
    headers = {
        "Accept": "application/json",
        "Accept-Language": "en-US,en;q=0.9,fr-FR;q=0.8,fr;q=0.7,es-US;q=0.6,es;q=0.5,it-IT;q=0.4,it;q=0.3"
    }

    async with aiohttp.ClientSession() as session:
        # Make a GET request with custom headers
        async with session.get("https://httpbin.io/anything", headers=headers) as response:
            data = await response.json()
            # Handle the response...
            print(data)

# Run the event loop
asyncio.run(fetch_with_custom_headers())
这样,AIOHTTP 将会发出一个 GET HTTP 请求,并设置 Accept 和 Accept-Language 标头。
设置自定义用户代理
User-Agent 是最重要的,用于网页抓取的 HTTP 标头之一。默认情况下,AIOHTTP 使用以下 User-Agent:
Python/<PYTHON_VERSION> aiohttp/<AIOHTTP_VERSION>但上述默认值很容易让目标网站发现您的请求由自动脚本发送,从而提升请求被屏蔽的风险。
为降低请求被检测到的几率,您可同以往那样,对 User-Agent 进行自定义设置,模拟真实的浏览器请求:
import aiohttp
import asyncio

async def fetch_with_custom_user_agent():
    # Define a Chrome-like custom User-Agent
    headers = {
        "User-Agent": "Mozilla/5.0 (Windows NT 10.0; Win64; x64) AppleWebKit/537.36 (KHTML, like Gecko) Chrome/132.0.0.0 Safari/537.36"
    }

    async with aiohttp.ClientSession(headers=headers) as session:
        # Make a GET request with the custom User-Agent
        async with session.get("https://httpbin.io/anything") as response:
            data = await response.text()
            # Handle the response...
            print(data)

# Run the event loop
asyncio.run(fetch_with_custom_user_agent())设置 Cookie
与 HTTP 标头一样,您可在 ClientSession() 中使用 cookies 设置自定义 Cookie:
import aiohttp
import asyncio

async def fetch_with_custom_cookies():
    # Define cookies as a dictionary
    cookies = {
        "session_id": "9412d7hdsa16hbda4347dagb",
        "user_preferences": "dark_mode=false"
    }

    async with aiohttp.ClientSession(cookies=cookies) as session:
        # Make a GET request with custom cookies
        async with session.get("https://httpbin.io/anything") as response:
            data = await response.text()
            # Handle the response...
            print(data)

# Run the event loop
asyncio.run(fetch_with_custom_cookies())
通过 Cookie,您可将网页抓取请求所需的会话数据包含其中。
请注意,相关会话发出的所有请求都将共享 ClientSession 中设置的 Cookie。要访问会话 Cookie,请使用 ClientSession.cookie_jar。
代理集成
在 AIOHTTP 中,您可通过代理服务器路由请求,降低 IP 封禁风险。您只需在 session 的 HTTP 方法函数中使用 proxy 实参,即可实现此目的:
import aiohttp
import asyncio

async def fetch_through_proxy():
    # Replace with the URL of your proxy server
    proxy_url = "<YOUR_PROXY_URL>"

    async with aiohttp.ClientSession() as session:
        # Make a GET request through the proxy server
        async with session.get("https://httpbin.io/anything", proxy=proxy_url) as response:
            data = await response.text()
            # Handle the response...
            print(data)

# Run the event loop
asyncio.run(fetch_through_proxy())
如想了解如何执行代理身份验证和轮换,请参阅“如何在 AIOHTTP 中使用代理”的指南。
错误处理
默认情况下,AIOHTTP 仅在出现连接或网络问题时才会报错。若要对状态码为 4xx 和 5xx 的 HTTP 响应引发异常,您可使用以下任一方法:
- 在创建
ClientSession时设置 “raise_for_status=True”:如果响应状态码为4xx或5xx,则自动为通过会话发出的所有请求引发异常。 - 直接将
raise_for_status=True传递给请求方法:为个别请求方法(如session.get()或session.post())启用报错机制,而不会影响其他方法的执行。 - 手动调用
response.raise_for_status():完全控制引发异常的时机,让您可以根据各个请求的具体情况决定何时引发异常。
选项 #1 示例:
import aiohttp
import asyncio

async def fetch_with_session_error_handling():
    async with aiohttp.ClientSession(raise_for_status=True) as session:
        try:
            async with session.get("https://httpbin.io/anything") as response:
                # No need to call response.raise_for_status(), as it is automatic
                data = await response.text()
                print(data)
        except aiohttp.ClientResponseError as e:
            print(f"HTTP error occurred: {e.status} - {e.message}")
        except aiohttp.ClientError as e:
            print(f"Request error occurred: {e}")

# Run the event loop
asyncio.run(fetch_with_session_error_handling())
当在会话级别设置 “raise_for_status=True” 后,通过该会话发出的所有请求都将针对 4xx 或 5xx 响应引发 aiohttp.ClientResponseError。
选项 #2 示例:
import aiohttp
import asyncio

async def fetch_with_raise_for_status():
    async with aiohttp.ClientSession() as session:
        try:
            async with session.get("https://httpbin.io/anything", raise_for_status=True) as response:
                # No need to manually call response.raise_for_status(), it is automatic
                data = await response.text()
                print(data)
        except aiohttp.ClientResponseError as e:
            print(f"HTTP error occurred: {e.status} - {e.message}")
        except aiohttp.ClientError as e:
            print(f"Request error occurred: {e}")

# Run the event loop
asyncio.run(fetch_with_raise_for_status())这种情况下,raise_for_status=True 实参会直接传递给 session.get() 调用。这可确保对任何 4xx 或 5xx 的状态码自动引发异常。
选项 #3 示例:
import aiohttp
import asyncio

async def fetch_with_manual_error_handling():
    async with aiohttp.ClientSession() as session:
        try:
            async with session.get("https://httpbin.io/anything") as response:
                response.raise_for_status()  # Manually raises error for 4xx/5xx
                data = await response.text()
                print(data)
        except aiohttp.ClientResponseError as e:
            print(f"HTTP error occurred: {e.status} - {e.message}")
        except aiohttp.ClientError as e:
            print(f"Request error occurred: {e}")

# Run the event loop
asyncio.run(fetch_with_manual_error_handling())
如您希望对各个请求有更多的控制权,则可在发出请求后手动调用 response.raise_for_status()。该方法让您可以精确决定何时处理错误。
重试失败的请求
AIOHTTP 没有内置自动重试请求支持。您必须使用自定义逻辑或 aiohttp-retry 之类的第三方库实现这一目标。它们让您可以为失败的请求配置重试逻辑,处理瞬时网络问题、超时或速率限制。
使用下方命令安装 aiohttp-retry:
pip install aiohttp-retry然后,您即可通过下方代码使用它:
import asyncio
from aiohttp_retry import RetryClient, ExponentialRetry

async def main():
    retry_options = ExponentialRetry(attempts=1)
    retry_client = RetryClient(raise_for_status=False, retry_options=retry_options)
    async with retry_client.get("https://httpbin.io/anything") as response:
        print(response.status)

    await retry_client.close()
这将通过指数回退策略配置重试行为。详情请参阅官方文档。
AIOHTTP 与 Requests 在网页抓取方面的异同之处
下方汇总表对比了 AIOHTTP 和 Requests 在网页抓取方面的异同之处:
| 功能 | AIOHTTP | Requests |
|---|---|---|
| GitHub 星数 | 15300 | 52400 |
| 客户端支持 | ✔️ | ✔️ |
| 同步支持 | ❌ | ✔️ |
| 异步支持 | ✔️ | ❌ |
| 服务器支持 | ✔️ | ❌ |
| 连接池 | ✔️ | ✔️ |
| HTTP/2 支持 | ❌ | ❌ |
| 自定义用户代理 | ✔️ | ✔️ |
| 代理支持 | ✔️ | ✔️ |
| Cookie 处理 | ✔️ | ✔️ |
| 重试机制 | 仅通过第三方库提供 | 通过 HTTPAdapter 提供 |
| 性能 | 高 | 中等 |
| 社区支持和受欢迎程度 | 中等 | 广受欢迎 |
如想查看详细的对比,请参阅博文《Requests、HTTPX、AIOHTTP 三者之间的比较》。
了解如何使用 HTTPX 抓取网站。
结语
在本文中, 您学习了使用 aiohttp 库进行网页抓取的具体操作。您了解了它的基本含义、功能和优势。在收集在线数据时,AIOHTTP 是快速可靠的 HTTP 请求发送工具。
但自动发送 HTTP 请求会暴露您的公共 IP 地址,从而会泄露您的身份和位置,导致个人隐私受到威胁。因此,您最好使用代理服务器来隐藏 IP 地址,这是保障您的安全和隐私的最有效策略之一。
Bright Data 掌控着全球最出色的代理服务器,为财富 500 强企业和 20,000 多家客户提供服务。其代理网络涵盖不同类型的代理:
- 数据中心代理 – 超过 77 万个数据中心 IP。
- 住宅代理 – 超过 7200 万个住宅 IP,遍布 195 个以上国家/地区。
- ISP 代理 – 超过 70 万个 ISP IP。
- 移动代理 – 超过 700 万个移动 IP。
立即创建免费的 Bright Data 账户,测试我们的代理和抓取解决方案!


技术写作
 5.5 years experience
Antonello是一名软件工程师,但他更喜欢称自己为技术传教士。通过写作传播知识是他的使命。