
代理是来自服务器的 IP 地址,可代表你连接到互联网。代理不会将你的请求直接传输到网站,而是通过服务器路由这些请求,从而隐藏你的原始 IP 地址和位置。这可以保护你的隐私、防止跟踪并避免封锁。代理还会加密你的数据以提供额外安全性。
在本文中,你将了解如何将代理与 Python requests 一起使用,特别是用于网页爬虫。网页爬虫涉及从网站提取数据,但许多网站有限制。代理通过更改你的 IP 和位置来帮助绕过这些限制,使网站更难检测并封锁你。你还可以使用多个代理来分配请求并加快流程。
接下来,你将了解如何使用 Requests Python 包在项目中实现代理。
如何将代理与 Python 请求一起使用
为了将代理与 Python 请求一起使用,你需要在计算机上建立一个新的 Python 项目,以编写并运行用于网页爬虫的 Python 脚本。创建一个目录(即 web_scrape_project),用于存储你的源代码文件。
本教程的所有代码都可在此 GitHub repo 中获得。
安装包
创建目录后,你需要安装以下 Python 包,以向网页发送请求并收集链接:
- Bright Data 的网页
代理 IP 地址的组成部分
在使用代理之前,最好先了解其组成部分。以下是代理服务器的三个主要组成部分:
- 协议 显示你可以在互联网上访问的内容类型。最常见的协议是 HTTP 和 HTTPS。
- 地址 显示代理服务器所在的位置。地址可以是 IP(即
192.167.0.1)或 DNS 主机名(即proxyprovider.com)。 - 端口 用于在单台机器上运行多个服务时,将流量引导到正确的服务器进程(即 端口号
2000)。
使用这三个组成部分,代理 IP 地址将如下所示: 192.167.0.1:2000 或 proxyprovider.com:2000。
如何直接在 Requests 中设置代理
在 Python requests 中设置代理有几种方法,在本文中,你将看到三种不同的场景。在第一个示例中,你将学习如何直接在 requests 模块中设置代理。
首先,你需要在用于网页抓取的 Python 文件中导入 Requests 和 Beautiful Soup 包。然后创建一个名为 proxies 的目录,其中包含代理服务器信息,以便在抓取网页时隐藏你的 IP 地址。在这里,你必须定义到代理 URL 的 HTTP 和 HTTPS 连接。
你还需要定义 Python 变量,以设置你想从中抓取数据的网页 URL。本教程中,URL 是 https://www.bright.cn/
接下来,你需要使用 request.get() 方法向网页发送 GET 请求。该方法接受两个参数:网站的 URL 和代理。然后,来自网页的响应会存储在 response 变量中。
要收集链接,请使用 Beautiful Soup 包解析网页的 HTML 内容,方法是将 response.content 和 html.parser 作为参数传递给 BeautifulSoup() 方法。
然后使用 find_all() 方法,并将 a 作为参数来查找网页上的所有链接。最后,使用 get() 方法提取每个链接的 href 属性。
以下是在 requests 中直接设置代理的完整源代码:
# import packages.
import requests
from bs4 import BeautifulSoup

# Define proxies to use.
proxies = {
    'http': 'http://proxyprovider.com:2000',
    'https': 'http://proxyprovider.com:2000',
}

# Define a link to the web page.
url = "https://brightdata.com/"

# Send a GET request to the website.
response = requests.get(url, proxies=proxies)

# Use BeautifulSoup to parse the HTML content of the website.
soup = BeautifulSoup(response.content, "html.parser")

# Find all the links on the website.
links = soup.find_all("a")

# Print all the links.
for link in links:
    print(link.get("href"))
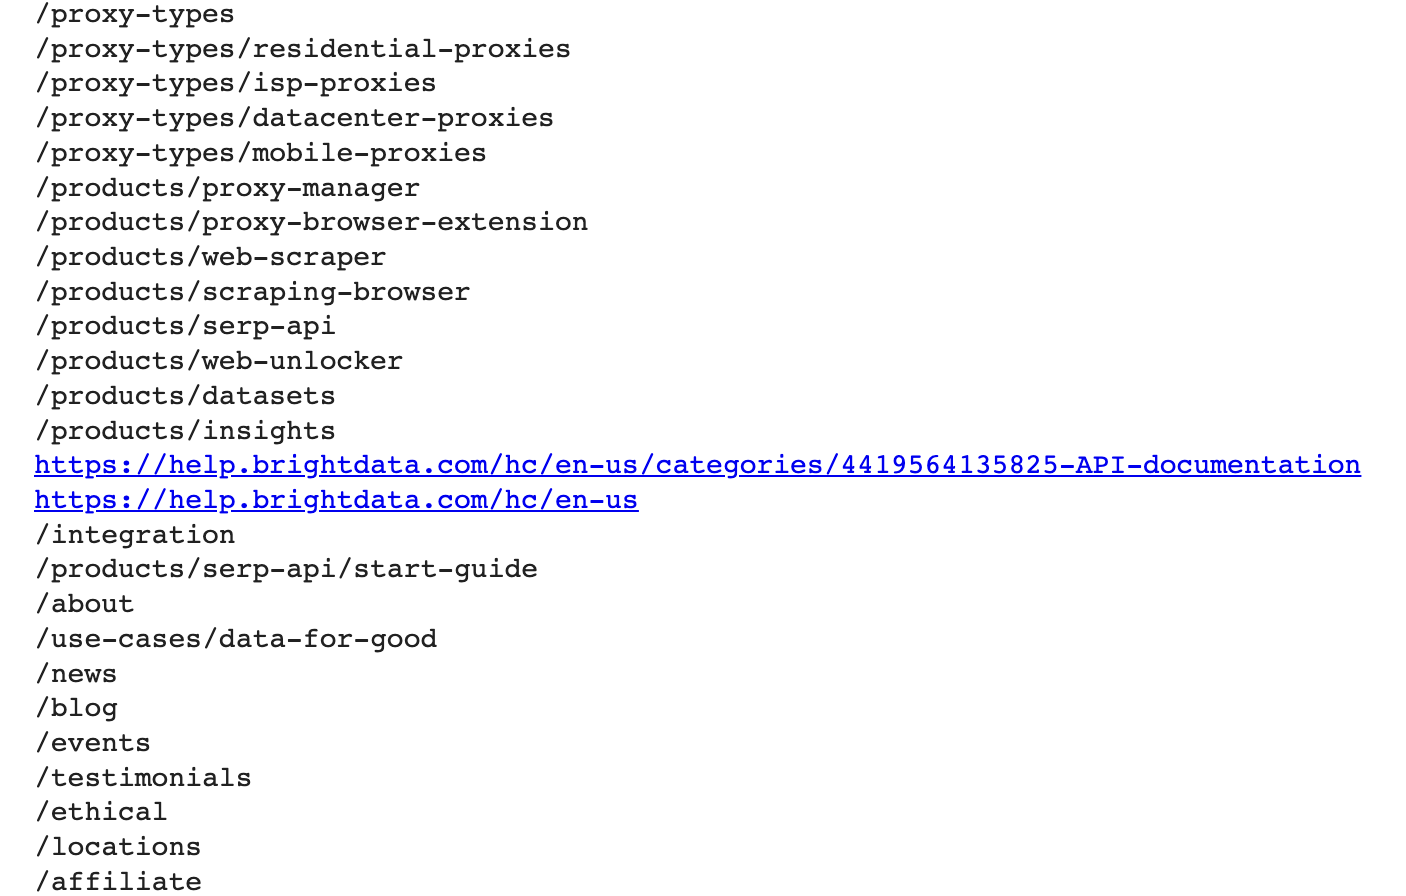
运行这段代码时,它会使用代理 IP 地址向已定义的网页发送请求,然后返回包含该网页所有链接的响应:
如何通过环境变量设置代理
有时,你必须对所有发往不同网页的请求使用同一个代理。在这种情况下,为代理设置环境变量是有意义的。
要使代理的环境变量在你每次在 shell 中运行脚本时都可用,请在终端中运行以下命令:
export HTTP_PROXY='http://proxyprovider.com:2000'
export HTTPS_PROXY='https://proxyprovider.com:2000'这里,HTTP_PROXY 变量为 HTTP 请求设置代理服务器,HTTPS_PROXY 变量为 HTTPS 请求设置代理服务器。
此时,你的 Python 代码只有几行代码,并且在你向网页发出请求时使用环境变量:
# import packages.
import requests
from bs4 import BeautifulSoup

# Define a link to the web page.
url = "https://brightdata.com/"

# Send a GET request to the website.
response = requests.get(url)

# Use BeautifulSoup to parse the HTML content of the website.
soup = BeautifulSoup(response.content, "html.parser")

# Find all the links on the website.
links = soup.find_all("a")

# Print all the links.
for link in links:
    print(link.get("href"))
如何使用自定义方法和代理数组轮换代理
轮换代理非常关键,因为当网站从同一个 IP 地址收到大量请求时,通常会封锁或限制机器人和爬虫工具的访问。发生这种情况时,网站可能会怀疑存在恶意抓取活动,并因此实施措施来封锁或限制访问。
通过在不同的代理 IP 地址之间轮换,你可以避免被检测到,看起来像多个自然用户,并绕过网站上实施的大多数反爬虫措施。
为了轮换代理,你需要导入几个 Python 库:Requests、Beautiful Soup 和 Random。
然后创建一个在轮换过程中使用的代理列表。此列表必须包含代理服务器的 URL,格式如下: http://proxyserver.com:port:
# List of proxies
proxies = [
    "http://proxyprovider1.com:2010", "http://proxyprovider1.com:2020",
    "http://proxyprovider1.com:2030", "http://proxyprovider2.com:2040",
    "http://proxyprovider2.com:2050", "http://proxyprovider2.com:2060",
    "http://proxyprovider3.com:2070", "http://proxyprovider3.com:2080",
    "http://proxyprovider3.com:2090"
]
然后创建一个名为 get_proxy() 的自定义方法。此方法使用 random.choice() 方法从代理列表中随机选择一个代理,并以字典格式(同时包含 HTTP 和 HTTPS 键)返回所选代理。每当你发送新请求时,都会使用此方法:
# Custom method to rotate proxies
def get_proxy():
    # Choose a random proxy from the list
    proxy = random.choice(proxies)
    # Return a dictionary with the proxy for both http and https protocols
    return {'http': proxy, 'https': proxy}
创建 get_proxy() 方法后,你需要创建一个循环,使用轮换代理发送一定数量的 GET 请求。在每个请求中,get() 方法使用由 get_proxy() 方法指定的随机选择代理。
然后,你需要使用 Beautiful Soup 包从网页的 HTML 内容中收集链接,如第一个示例中所述。
最后,Python 代码会捕获请求过程中发生的任何异常,并将错误消息打印到控制台。
以下是此示例的完整源代码:
# import packages
import requests
from bs4 import BeautifulSoup
import random

# List of proxies
proxies = [
    "http://proxyprovider1.com:2010", "http://proxyprovider1.com:2020",
    "http://proxyprovider1.com:2030", "http://proxyprovider2.com:2040",
    "http://proxyprovider2.com:2050", "http://proxyprovider2.com:2060",
    "http://proxyprovider3.com:2070", "http://proxyprovider3.com:2080",
    "http://proxyprovider3.com:2090"
]


# Custom method to rotate proxies
def get_proxy():
    # Choose a random proxy from the list
    proxy = random.choice(proxies)
    # Return a dictionary with the proxy for both http and https protocols
    return {'http': proxy, 'https': proxy}


# Send requests using rotated proxies
for i in range(10):
    # Set the URL to scrape
    url = 'https://brightdata.com/'
    try:
        # Send a GET request with a randomly chosen proxy
        response = requests.get(url, proxies=get_proxy())

        # Use BeautifulSoup to parse the HTML content of the website.
        soup = BeautifulSoup(response.content, "html.parser")

        # Find all the links on the website.
        links = soup.find_all("a")

        # Print all the links.
        for link in links:
            print(link.get("href"))
    except requests.exceptions.RequestException as e:
        # Handle any exceptions that may occur during the request
        print(e)
将 Bright Data 代理服务与 Python 一起使用
如果你正在为网页爬虫任务寻找可靠、快速且稳定的代理,那么 Bright Data 是不二之选,它是一个网页数据平台,提供适用于各种用例的不同类型的代理。
Bright Data 拥有庞大的网络,包括每月超过 400M+ 的住宅代理 IP 和超过 770,000 个数据中心代理,这有助于他们提供可靠且快速的代理解决方案。他们的代理产品旨在帮助你克服网页爬虫、广告验证以及其他需要匿名且高效的网页数据收集的在线活动所面临的挑战。
将 Bright Data 的代理集成到你的 Python requests 中非常简单。例如,使用 数据中心代理 向前面示例中使用的 URL 发送请求。
如果你还没有账户,请注册 Bright Data 免费试用,然后添加你的详细信息以在平台上注册账户。
完成后,请按照以下步骤创建你的第一个代理:
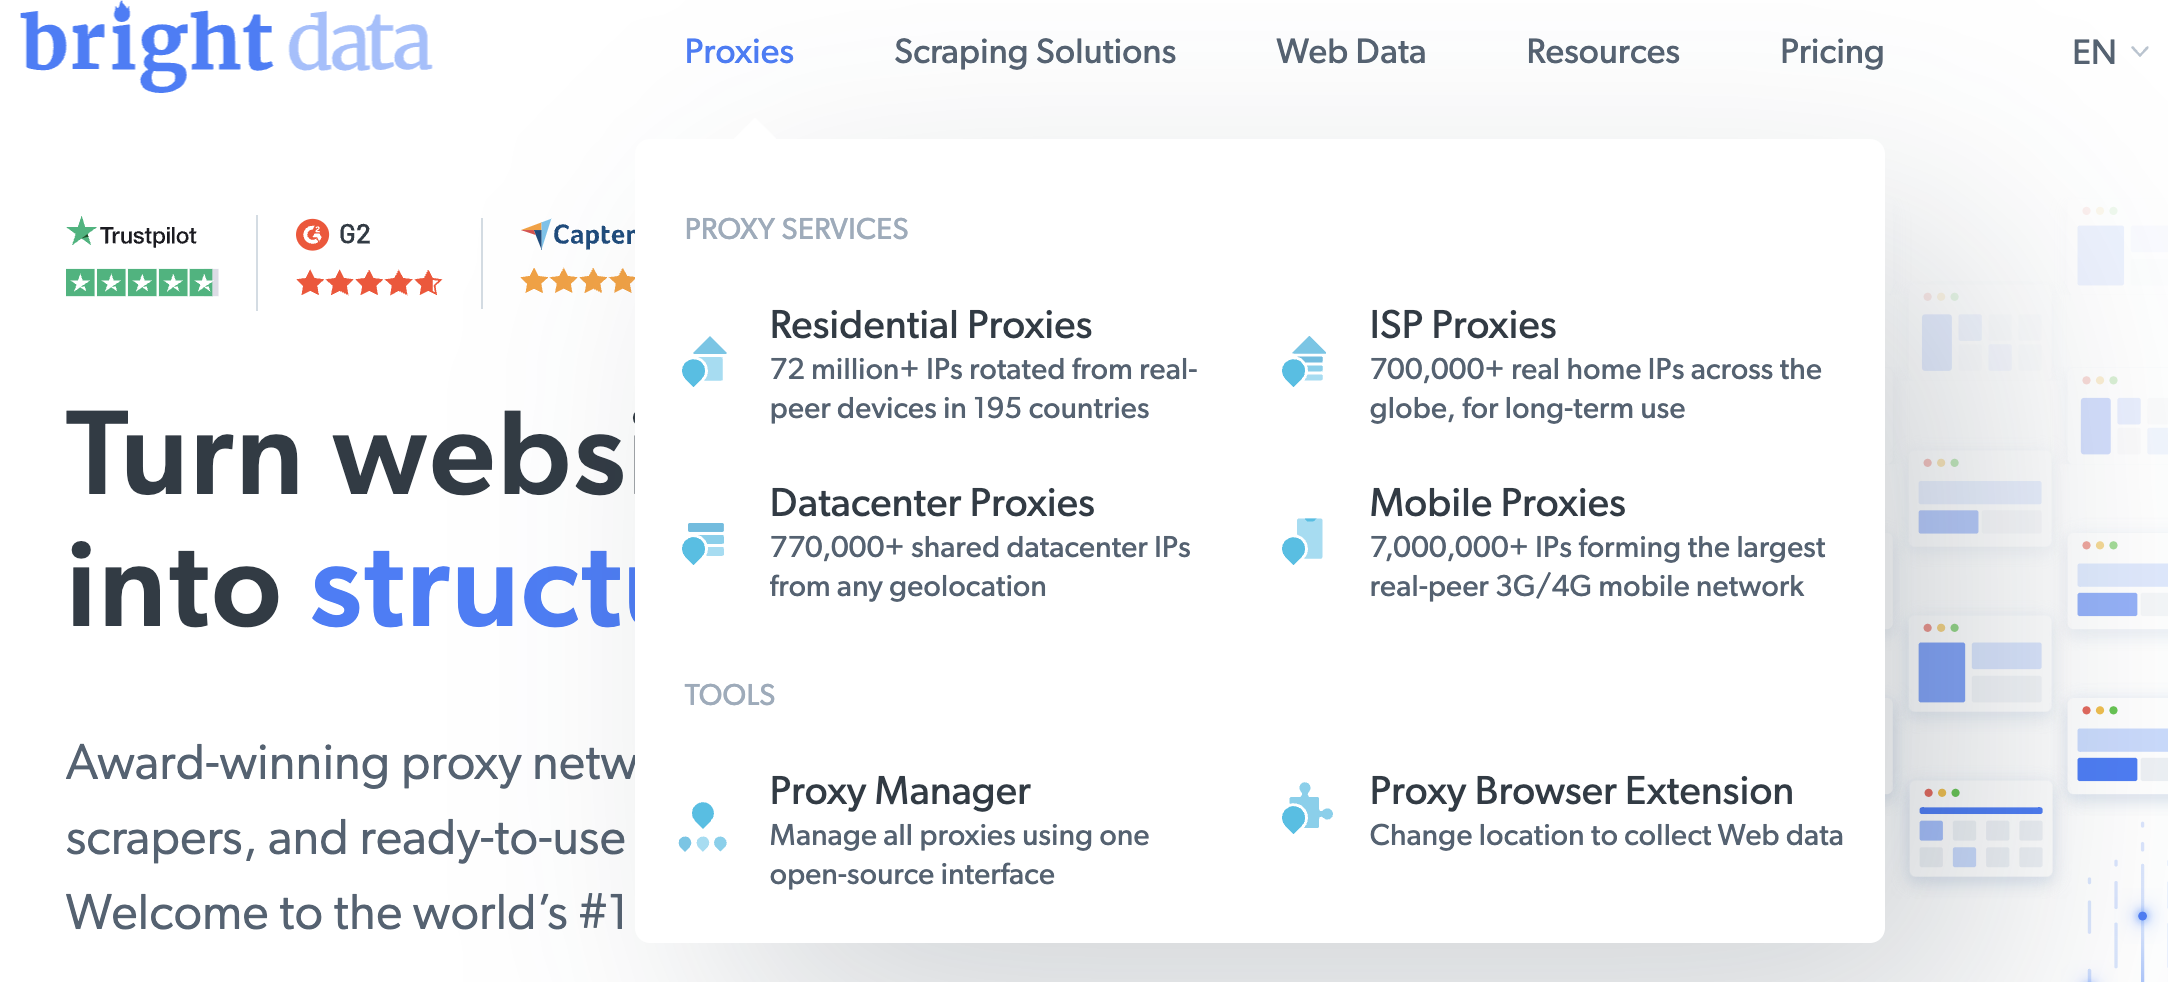
在欢迎页面上点击 查看代理产品 以查看 Bright Data 提供的不同类型代理:
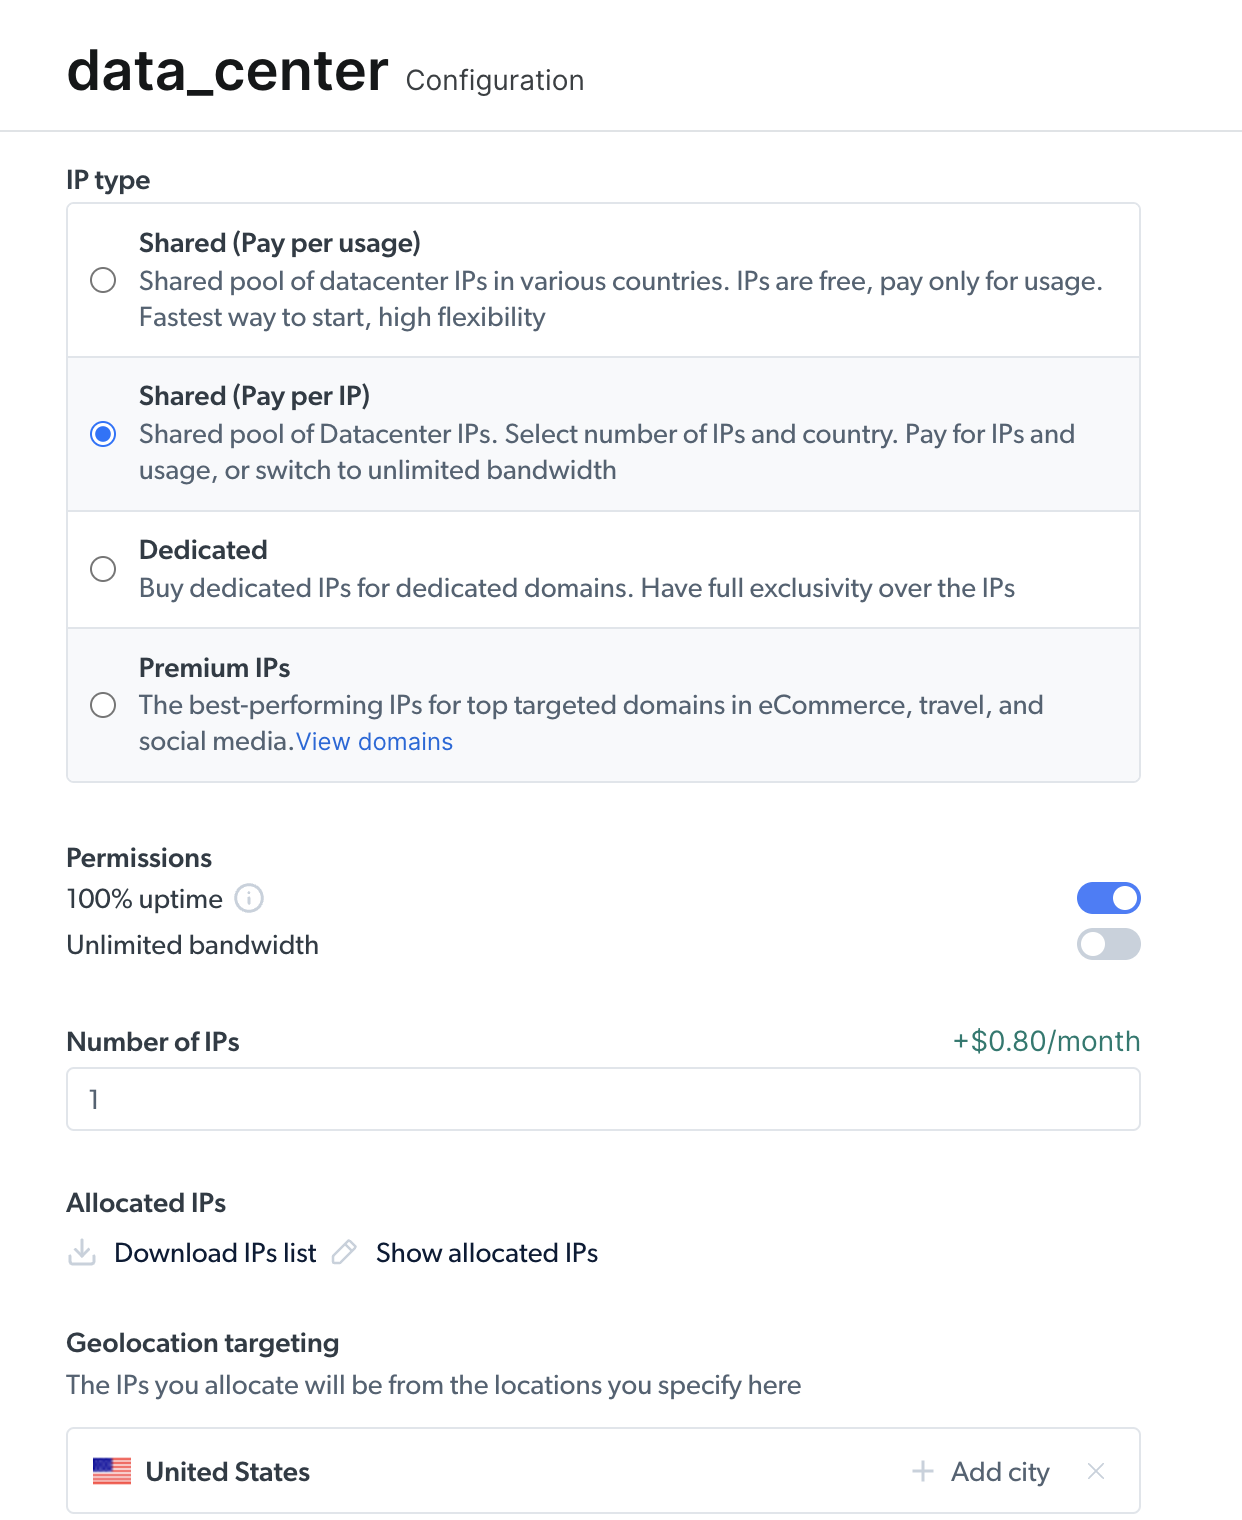
选择 数据中心代理 来创建一个新代理,并在后续页面上添加你的详细信息,然后保存:
创建代理后,你可以查看重要参数(即 host、port、username 和 password),以开始访问并使用它:
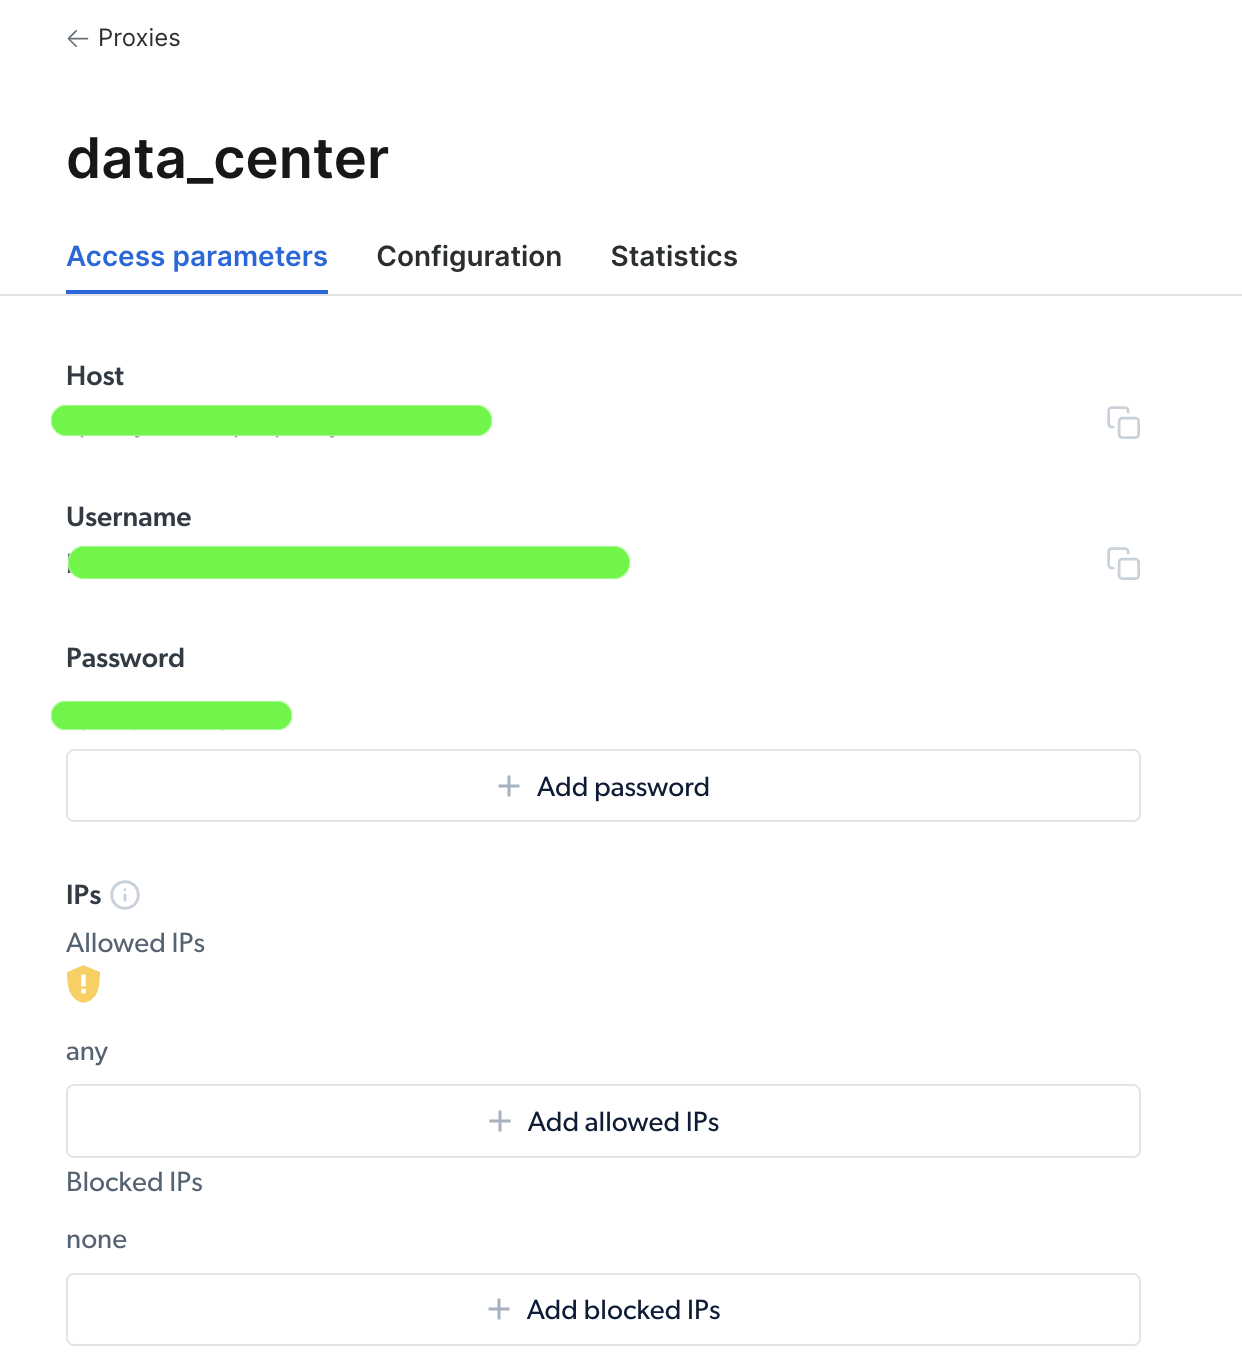
访问代理后,你可以使用参数信息来配置代理 URL,并使用 Requests Python 包发送请求。代理 URL 的格式为 username-(session-id)-password@host:port。
注意:
session-id是使用名为random的 Python 包创建的随机数。
以下是你的代码示例,用于在 Python 请求中设置来自 Bright Data 的代理:
import requests
from bs4 import BeautifulSoup
import random

# Define parameters provided by Brightdata
host = 'brd.superproxy.io'
port = 33335
username = 'username'
password = 'password'
session_id = random.random()

# format your proxy
proxy_url = ('http://{}-session-{}:{}@{}:{}'.format(username, session_id,
                                                     password, host, port))

# define your proxies in dictionary
proxies = {'http': proxy_url, 'https': proxy_url}

# Send a GET request to the website
url = "https://brightdata.com/"
response = requests.get(url, proxies=proxies)

# Use BeautifulSoup to parse the HTML content of the website
soup = BeautifulSoup(response.content, "html.parser")

# Find all the links on the website
links = soup.find_all("a")

# Print all the links
for link in links:
    print(link.get("href"))
这里,你导入包并定义代理 host、port、username、password 和 session_id 变量。然后,你创建一个带有 http 和 https 键以及代理凭据的 proxies 字典。最后,你将 proxies 参数传递给 requests.get() 函数,以发出 HTTP 请求并从 URL 收集链接。
就是这样!你刚刚使用 Bright Data 的代理服务成功发出了一个请求。
结论
在本文中,你了解了为什么需要代理,以及可以使用它们通过 Requests Python 包向网页发送请求的不同方式。
借助 Bright Data 的网页平台,你可以为项目获取可靠代理,覆盖世界上任何国家或城市。他们通过各种类型的代理和网页爬虫工具提供多种获取所需数据的方式,以满足你的特定需求。
无论你是想收集市场研究数据、监控在线评论,还是跟踪竞争对手定价,Bright Data 都拥有你快速高效完成工作所需的资源。

支持支付宝等多种支付方式